
To construct a log splitter workbench, start by planning an ergonomic, sturdy design with organized tool storage. Choose strong, durable materials like hardwood or steel for the frame and surface, ensuring stability and safety. Prepare a solid foundation and mount the work surface at a comfortable height. Add storage solutions and safety features, then tighten all connections and check stability. Keep security and maintenance in mind—continuing will reveal detailed steps to build a reliable workspace.
Key Takeaways
- Plan an ergonomic, stable, and organized work surface with proper height, material selection, and storage solutions for efficiency and safety.
- Select durable, wear-resistant materials like hardwood or steel for the work surface and frame to ensure longevity.
- Prepare a solid, level foundation such as reinforced concrete or treated wood, and secure the work surface to prevent movement.
- Build a sturdy frame using metal joints or welding, reinforcing stress points, and incorporating storage and accessory mounts.
- Conduct thorough safety checks, tighten fastenings, and perform regular maintenance to ensure safe, reliable operation of the workbench.

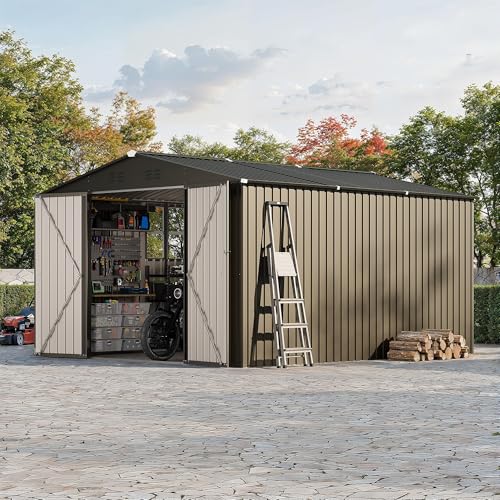
GarveeLife 12 X 10 ft Outdoor Storage Shed, Metal Garden Sheds & Outdoor Storage with Updated Frame Structure, Backyard Garden Terrace Tool Shed for Backyard, Lawn, Patio, Bike Storage, Gray
Durable & Stable Storage Shed: Built to last, this heavy-duty metal storage shed features thicker galvanized steel for...
As an affiliate, we earn on qualifying purchases.
Planning Your Workbench Design and Layout

Before building your log splitter workbench, you need to carefully plan its design and layout to make certain it meets your needs. Focus on ergonomic considerations to reduce strain and improve comfort during use, ensuring the work surface height and tool placement promote efficiency. Think about ergonomics to minimize fatigue and prevent injury, especially during extended projects. Additionally, consider aesthetic appeal—an attractive workbench boosts motivation and creates a more inviting workspace. Plan for clear organization, with designated spots for tools and accessories, so everything is within easy reach. Keep the layout practical, balancing functionality with visual appeal. Incorporating principles from projector image quality can help you optimize your workspace lighting and reduce glare, enhancing overall comfort. Paying attention to industry trends can also inform your design choices and introduce innovative features. Integrating ergonomic design principles can further improve safety and comfort during long hours of work. Considering tool accessibility in your layout ensures that frequently used items are within arm’s reach, saving time and effort. Additionally, reviewing regional legal resources can help you understand safety standards and regulations for workspace setup, ensuring compliance. By thoughtfully designing your workbench, you’ll enhance safety, comfort, and productivity, making your log splitting tasks smoother and more enjoyable.

Patiowell 10 x 12 FT Metal Storage Shed for Outdoor, Steel Yard Shed with Design of Lockable Doors, Utility and Tool Storage for Garden, Backyard, Patio, Outside use,Brown
Spacious Interior: Enjoy an expansive interior space designed to accommodate your storage needs. Its increased overall height provides...
As an affiliate, we earn on qualifying purchases.
Selecting Suitable Materials and Tools

Choosing the right materials and tools is key to building a durable and functional log splitter workbench. Your material selection should prioritize strength, stability, and resistance to wear. For tool requirements, select items that guarantee safety and efficiency during construction. Consider using sturdy hardwood or steel for the frame, as they can handle heavy loads. The following table highlights essential materials and tools:
| Material Selection | Tool Requirements |
|---|---|
| Steel or hardwood | Power drill |
| Heavy-duty screws | Wrench |
| Durable work surface | Measuring tape and level |
This combination guarantees your workbench will withstand tough tasks, providing a solid foundation for your log splitting projects. Properly choosing materials and tools sets the stage for a successful build. Additionally, selecting local store hours ensures you can acquire supplies conveniently and plan your project accordingly. Selecting appropriate construction materials also contributes to the overall safety and longevity of your workbench. Incorporating material durability considerations can further enhance the resilience of your workbench over time. Understanding load capacity is essential to ensure your workbench can safely support heavy logs during use. It is also beneficial to consider sustainable materials to minimize environmental impact while maintaining quality.
10X12 FT Storage Shed,Lockable Gable Roof Garden Shed with Grid Window, All-Weather Resistant Storage Unit for Bikes, Ladders, Patio Supplies & Garden Essentials
【Premium All-Weather Galvanized Steel Construction】 Crafted from superior waterproof, rust-resistant and UV-protected galvanized steel, this shed ensures reliable...
As an affiliate, we earn on qualifying purchases.
Preparing the Foundation and Work Surface

To guarantee your workbench is stable and safe for log splitting, start by preparing a solid foundation. Ascertain the surface is level and sturdy enough to handle heavy logs and repetitive impact. A reinforced concrete pad or treated wooden base works well for durability. Once in place, focus on creating an ergonomic work surface height that reduces strain during long sessions. Incorporate features for aesthetic customization, like painted or stained finishes, to match your workspace. This not only enhances visual appeal but also provides a smooth, protective surface that’s easy to clean. A stable work surface is essential to prevent accidents and ensure efficient operation. Prioritize stability and comfort at this stage, as they set the tone for safe, efficient log splitting. Additionally, considering the stability of the work surface can help prevent accidents and improve overall safety. A well-prepared foundation and work surface make all subsequent steps easier and more effective, especially when maintaining workbench safety standards. Enhancing work surface durability can also contribute to a longer-lasting and more reliable workbench. Incorporating skilled construction techniques ensures the foundation remains robust over time.

Polar Aurora 12x10 FT Outdoor Storage Shed, Metal Garden Shed with with Updated Frame Structure, Heavy Duty Weatherproof Tool Sheds for Backyard Garden Patio Lawn, White
【Product Size】The size of 112.5"D x 137.7"W x 81.1"H storage tool shed provides plenty of space for all...
As an affiliate, we earn on qualifying purchases.
Building the Frame and Support Structure
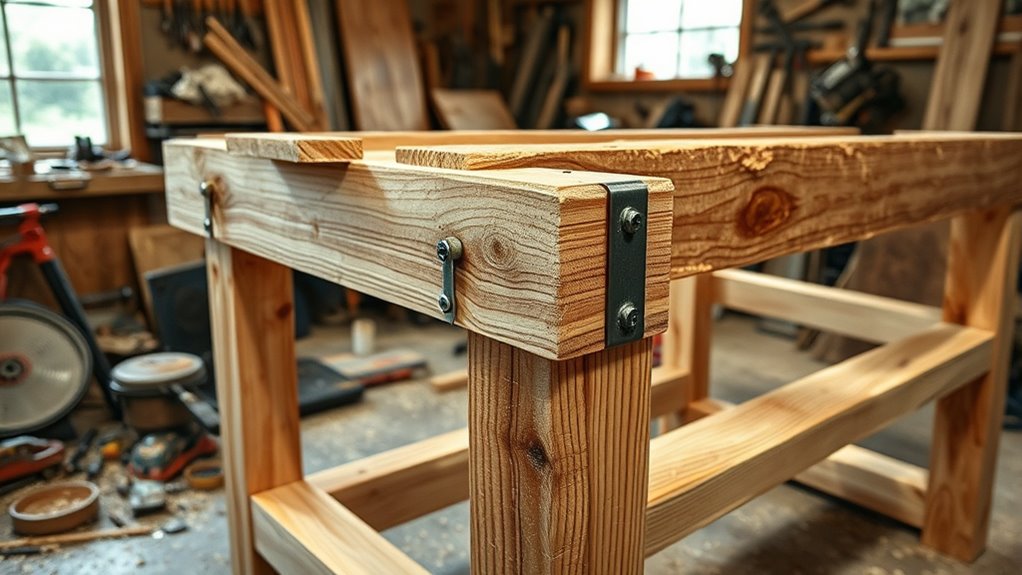
Building the frame and support structure is a critical step in guaranteeing your log splitter workbench is strong and stable. Focus on creating a sturdy foundation using durable materials and proper metal joints to connect the frame securely. Pay attention to ergonomic design by positioning supports for comfortable access and safe operation. Properly welded or bolted metal joints will prevent wobbling and ensure long-term durability. Keep the structure level and square to avoid instability during use. Reinforce key stress points with additional braces or supports. Incorporating essential metal joints can significantly enhance the overall strength and stability of the workbench. Ensuring the correct assembly techniques are used will help maintain the integrity of the structure over time. Applying structural reinforcement techniques can further improve the workbench’s capacity to handle heavy loads and extend its lifespan. Using appropriate fastening methods is also vital for maintaining a secure and durable frame. Selecting the right connection methods is essential for ensuring the workbench remains reliable under repeated use. This stage sets the foundation for a reliable work surface and safe work environment. A well-built frame guarantees your workbench can withstand heavy logs and frequent use without compromise.
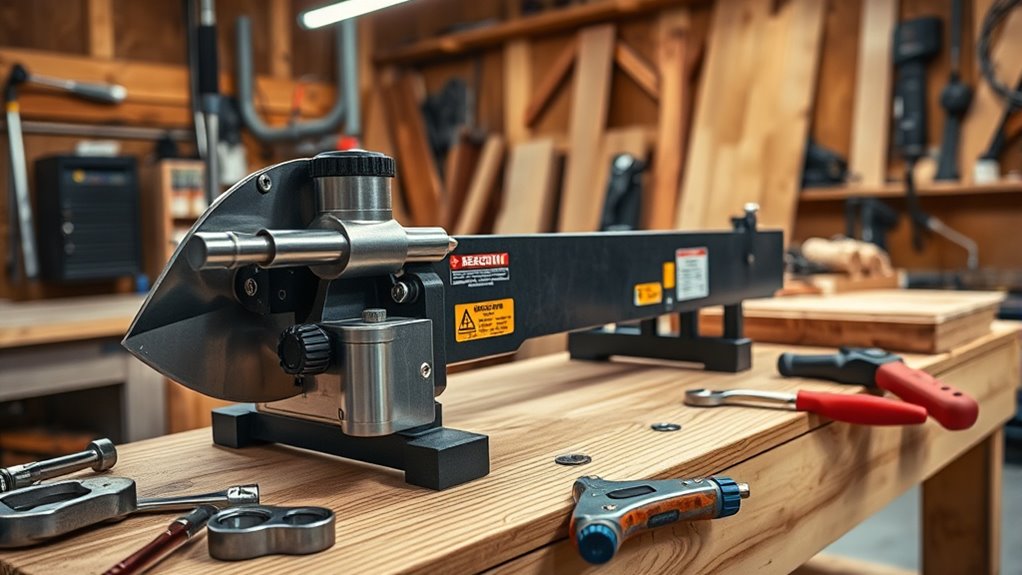
Installing the Work Surface and Stability Features

After securing the frame, the next step is to install the work surface and stability features that will guarantee safe and efficient operation. Begin by attaching a sturdy, flat surface that can support logs and tools, ensuring it’s level and secure. Incorporate safety precautions by adding non-slip pads or textured coatings to prevent slipping during use. Consider ergonomic factors by positioning the work surface at a comfortable height to reduce strain and improve control. Reinforce stability with braces or support legs to prevent wobbling or shifting when applying force. Double-check all fastenings for tightness and stability before use. Proper installation of these features not only enhances safety but also streamlines your workflow, making log splitting safer and more comfortable. Additionally, choosing appropriate materials for the work surface can increase durability and resistance to wear. Ensuring the stability features are properly aligned with cybersecurity best practices can help prevent accidents and improve safety protocols during operation.
Adding Storage and Accessory Mounts
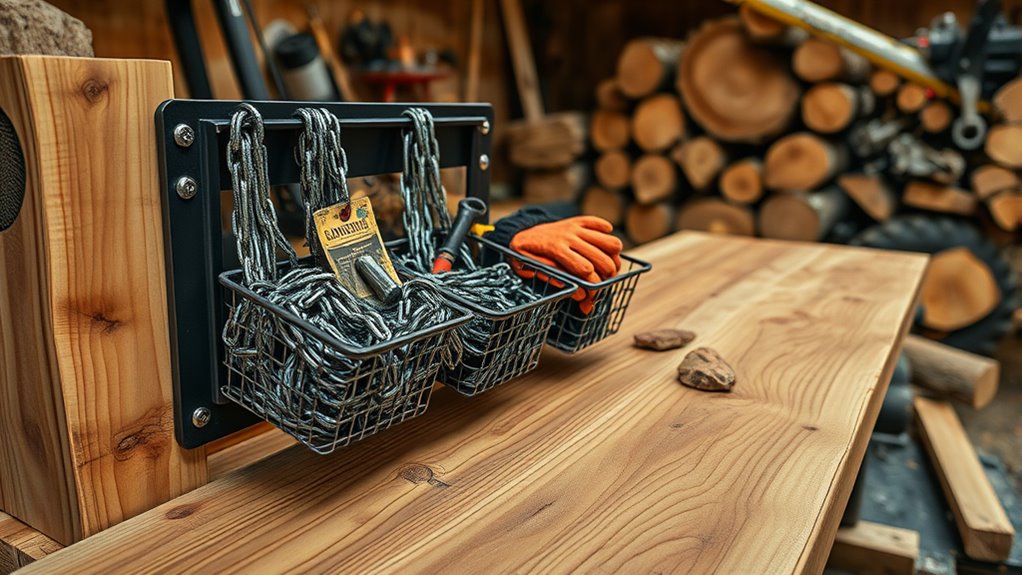
Adding storage and accessory mounts to your log splitter enhances organization and efficiency during operation. Proper storage solutions keep your workspace tidy, making tools and supplies easy to find. By incorporating accessory mounting options, you can quickly attach items like log tongs, wedges, or safety gear, saving time and reducing clutter. Consider installing hooks, shelves, or bins specifically designed for your workbench to maximize space and accessibility. These features help streamline your workflow and ensure important tools are always within reach. Whether you’re storing small accessories or larger tools, strategic storage solutions keep your work area safe and efficient. Focus on sturdy, easy-to-access mounts that support your most-used accessories, improving your overall productivity during log splitting tasks.
Final Assembly, Safety Checks, and Maintenance Tips
Before using your log splitter, it’s essential to complete the final assembly, perform safety checks, and follow maintenance tips to guarantee safe and efficient operation. Start by inspecting all safety gear, such as gloves, eye protection, and hearing protection, to ensure they’re in good condition. Verify that all components are securely assembled and that no loose bolts or parts remain. Establish a maintenance schedule, including regular lubrication and inspection of hydraulic hoses and the motor. Check the work area for hazards before operation. Safety checks should be done each time you use the splitter to prevent accidents. Following proper assembly, wearing safety gear, and sticking to a maintenance routine will keep your log splitter running smoothly and safely.
Frequently Asked Questions
How Do I Customize the Workbench for Different Log Sizes?
To customize your workbench for different log sizes, you should incorporate an adjustable height feature and a modular design. Adjust the height to comfortably handle various log dimensions and reduce strain. Use modular components like removable or movable supports to accommodate different log lengths and diameters. This flexibility allows you to quickly adapt your workbench, making your splitting tasks easier and more efficient, no matter the log size you’re working with.
What Are the Best Ways to Prevent Wood Splinters on the Surface?
Imagine you’re working on your workbench when you notice wood splinters. To prevent this, you should always wear safety gloves and apply protective coatings like sealants or varnishes to the surface. For example, one woodworker improved safety by coating their workbench with a durable finish, reducing splinters and making it safer. Regularly sanding the surface also helps, ensuring smoothness and minimizing splinter risks.
How Can I Make the Workbench Mobile for Easier Relocation?
To make your workbench mobile, attach portable caster wheels to its base. Opt for lightweight framing materials to keep it easy to move without sacrificing stability. Secure the caster wheels firmly, ensuring they can swivel smoothly for better maneuverability. This setup allows you to relocate your workbench effortlessly, making your workspace more flexible and convenient. Just make sure to lock the wheels when you’re working to prevent unwanted movement.
What Environmentally Friendly Materials Can I Use for Construction?
When choosing environmentally friendly materials, consider bamboo flooring for its rapid growth and renewability, making it a sustainable choice. Recycled steel is also excellent, as it reduces waste and conserves resources while providing strength and durability. You can incorporate these materials into your workbench design, ensuring that your project is eco-conscious and sturdy. Using bamboo and recycled steel helps minimize your environmental impact without sacrificing quality or functionality.
How Do I Ensure the Workbench Remains Level Over Time?
To keep your workbench level over time, you should use effective leveling techniques like adjusting adjustable feet or shimming uneven legs. Incorporate surface stabilization by adding a sturdy, non-slip base or using a leveling compound beneath it. Regularly check the level with a spirit level and make small adjustments as needed. These steps help maintain stability, ensuring your workbench remains perfectly level, even with daily use or shifting ground.
Conclusion
Now that your workbench is nearly complete, imagine the countless logs you’ll effortlessly split, sparks flying as your sturdy surface withstands every strike. With everything in place, the only thing left is to test its strength and stability—are you ready to unleash its full potential? As you step back and survey your work, a sense of pride and anticipation builds, knowing this mighty foundation will soon become the centerpiece of your toughest projects.