To sharpen a dull wedge, start by inspecting it for damage, then clean off dirt and rust. Secure it firmly in a vise or clamp. Use a suitable file or grinder to carefully re-establish a sharp bevel, maintaining an angle of 20-30 degrees. Hone the edge with a fine stone or polisher for a clean finish, testing its sharpness afterward. For detailed steps and safety tips, continue exploring the full process.
Key Takeaways
- Secure the wedge firmly in a vise or clamp to ensure stability during sharpening.
- Clean the wedge thoroughly to remove dirt, rust, and debris for optimal sharpening results.
- Use a sharpening stone or file at a consistent 20-30° angle, applying steady, even strokes.
- Hone and polish the edge with fine grit or diamond abrasives to refine sharpness and remove burrs.
- Test the sharpness with a paper or fingernail test, and make final adjustments for a clean, effective edge.
Gather the Necessary Tools and Safety Equipment
Before you begin sharpening your dull wedge, acquiring all the necessary tools and safety equipment is vital. You’ll need a sharpening stone or file suited for the wedge’s material, and possibly a honing guide for consistent angles. Wear safety goggles to protect your eyes from sparks or debris, and thick gloves to shield your hands. A sturdy work surface or bench is essential for stability. Keep a clean cloth nearby for wiping the wedge after sharpening. If you’re using power tools, ensure they are in good working order and plugged into a safe outlet. Having everything ready before you start prevents interruptions and helps you work efficiently. Additionally, understanding the importance of contrast ratio in image quality can help you appreciate the benefits of a well-sharpened wedge. Ensuring proper ergonomic setup can also reduce fatigue and improve precision during the sharpening process. Paying attention to material compatibility ensures you select the right sharpening method for your wedge, prolonging its lifespan. Incorporating AI-powered virtual reality in e-learning techniques can enhance your understanding of sharpening angles and techniques through interactive simulations. Recognizing the significance of resilience in skill development can motivate you to persevere through challenging sharpening tasks. Safety should always come first, so double-check your gear before handling the wedge.
Inspect the Wedge for Damage and Wear
Inspecting your wedge thoroughly is essential to determine if it’s worth sharpening or needs replacement. First, check for cracks, chips, or any visible damage along the edges and body. Damage can weaken the wedge, making sharpening ineffective or unsafe. Look for signs of excessive wear, such as rounded edges or flattened surfaces, which indicate it’s lost its shape and cutting ability. Run your fingers along the wedge’s surface to feel for irregularities or rough spots. If you notice significant damage or wear, replacing the wedge might be your best option. Only proceed with sharpening if the wedge remains structurally sound and retains its original shape. Proper inspection ensures you avoid wasting time on a damaged tool and guarantees safe, effective sharpening. Additionally, understanding the wear patterns can help you determine whether sharpening will restore the wedge’s performance or if replacement is necessary. Regular inspection and proper maintenance can extend the life of your tools and ensure optimal performance during use. Recognizing damage signs early can prevent accidents and improve your overall work quality.
Clean the Wedge Before Sharpening
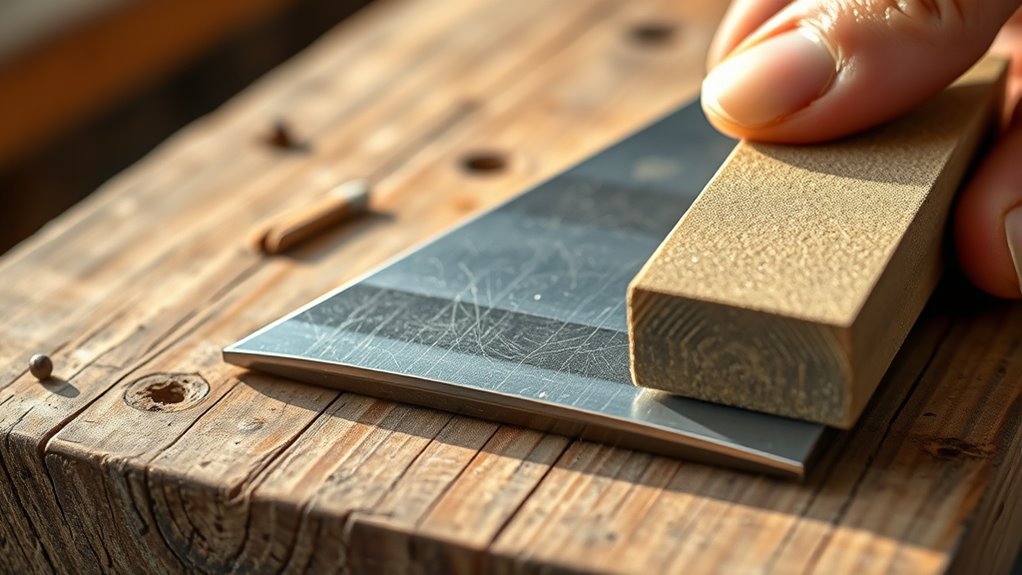
Cleaning the wedge thoroughly removes dirt, rust, and debris that can interfere with sharpening. Use a wire brush or steel wool to scrub away loose grime, then wipe it down with a damp cloth. For stubborn rust, apply a rust remover or soak the wedge in vinegar, then scrub again. Make sure to dry it completely to prevent new rust from forming. Removing dirt and rust ensures the sharpening process is smooth and effective, preventing uneven edges and damage. A clean wedge allows your sharpening tools to make proper contact with the metal, resulting in a sharper, more precise edge. Taking the time to clean the wedge before sharpening helps you achieve better results and extends the lifespan of both your wedge and your sharpening equipment. Proper cleaning also involves removing debris from the surface to ensure optimal sharpening performance.
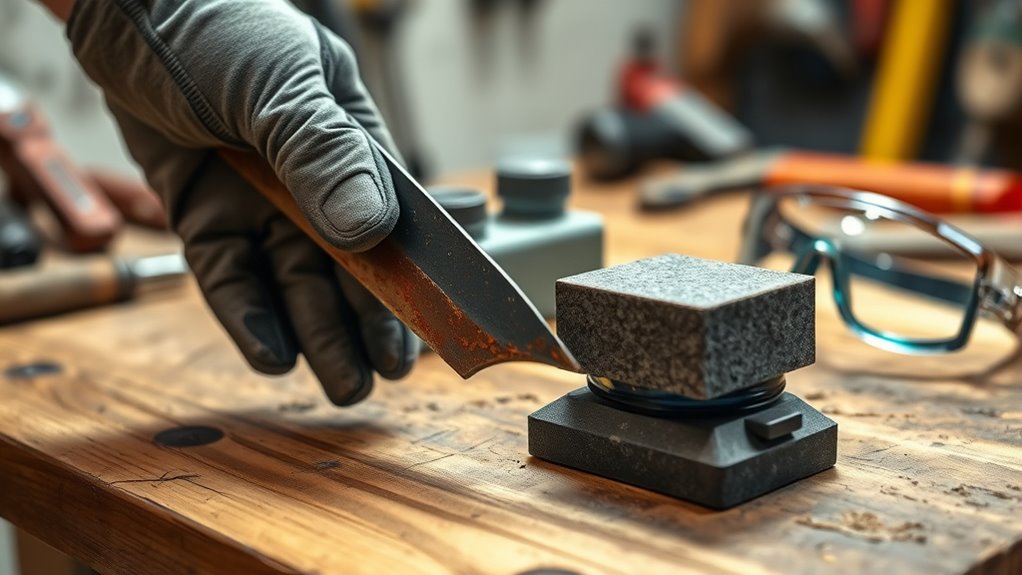
Secure the Wedge in a Stable Position
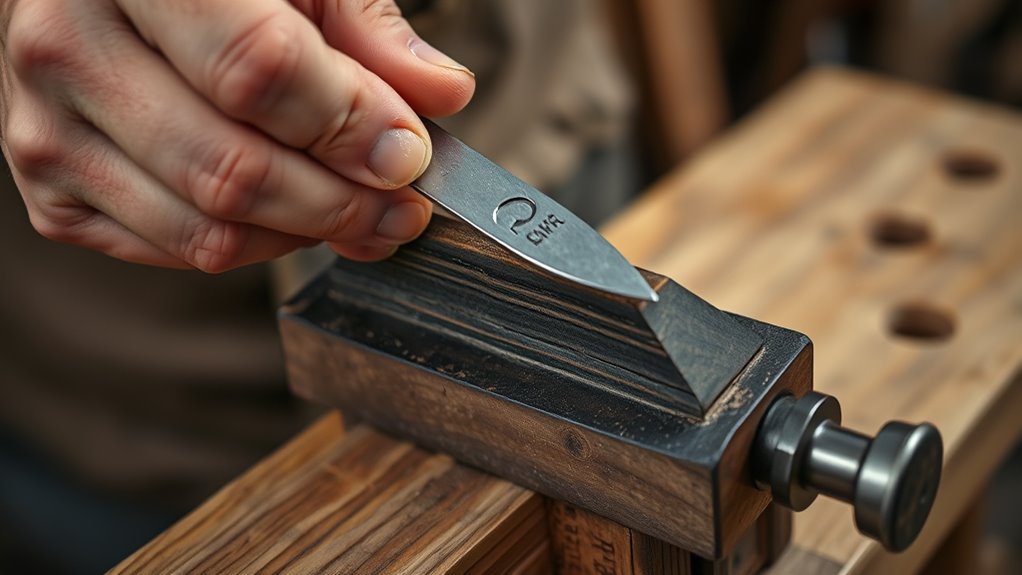
Securing the wedge in a stable position is essential to guarantee safety and precision during sharpening. Use a sturdy clamp or vise to hold the wedge firmly in place. Make sure the wedge’s bevel faces upward or outward, depending on your sharpening technique. Avoid over-tightening, which can damage the tool or cause slipping. If you don’t have a clamp, place the wedge on a non-slip surface, like a rubber mat, and hold it steadily with your hand. Always keep your fingers clear of the sharpening tool’s path. A secure hold prevents movement, reducing the risk of accidents and ensuring you sharpen evenly. Proper tool stability is crucial for effective sharpening. Take your time setting up; a stable position makes the entire process safer and more effective. Ensuring your workspace and tools are properly maintained and safe to use can further prevent mishaps during sharpening. Incorporating stability techniques into your setup can help maintain control throughout the process. Additionally, using tools with energy-efficient features can reduce overall fatigue and improve precision. Being aware of industry trends can also help you select the best techniques and tools for your sharpening needs.
Choose the Right Sharpening Method
Choosing the right sharpening method depends on your wedge’s material and your experience level. Manual sharpeners give you more control, but electric ones can save time for larger jobs. Consider these factors to pick the most effective approach for your needs. Additionally, understanding the type of material in your wedge, such as performance enhancements, can help determine the best sharpening technique to maintain optimal performance. For example, wedges with advanced alloy compositions may require specialized sharpening tools to avoid damage and preserve their designed properties. Being aware of AI vulnerabilities can also inform how you handle delicate or high-tech materials in manufacturing or maintenance processes.
Manual vs. Electric Sharpeners
When deciding between manual and electric sharpeners, understanding their differences can help you pick the best tool for your needs. Manual sharpeners are compact, portable, and give you more control over the sharpening process. They usually require you to hold the tool steady and rotate the wedge against an abrasive surface. Electric sharpeners, on the other hand, automate the process, making it faster and more consistent. They are ideal if you have multiple wedges to sharpen regularly or want a quick, uniform edge. However, they can be bulkier and more expensive. Your choice depends on your comfort level, frequency of use, and precision needs. If you prefer a hands-on approach and control, a manual sharpener works well. If convenience and speed are priorities, an electric sharpener is a better fit.
Assessing Wedge Material Type
Understanding the material of your wedge is essential for selecting the right sharpening method. Different materials require different approaches to avoid damage and ensure an effective edge. Soft woods like cedar or pine can be sharpened easily with a simple file or coarse grit stone. Harder woods or composite materials may need finer abrasives to prevent splintering. Recognizing whether your wedge is made of steel, aluminum, or carbon composite helps you choose the best method.
| Material Type | Recommended Tool | Caution |
|---|---|---|
| Soft wood | Coarse grit stone or file | Avoid excessive pressure |
| Hard wood | Fine grit stone or diamond | Prevent splintering |
| Steel | Sharpening stone or grinder | Watch for overheating |
| Aluminum | Light abrasive, polishing | Prevent gouging |
| Composite | Diamond or fine stone | Use gentle pressure |
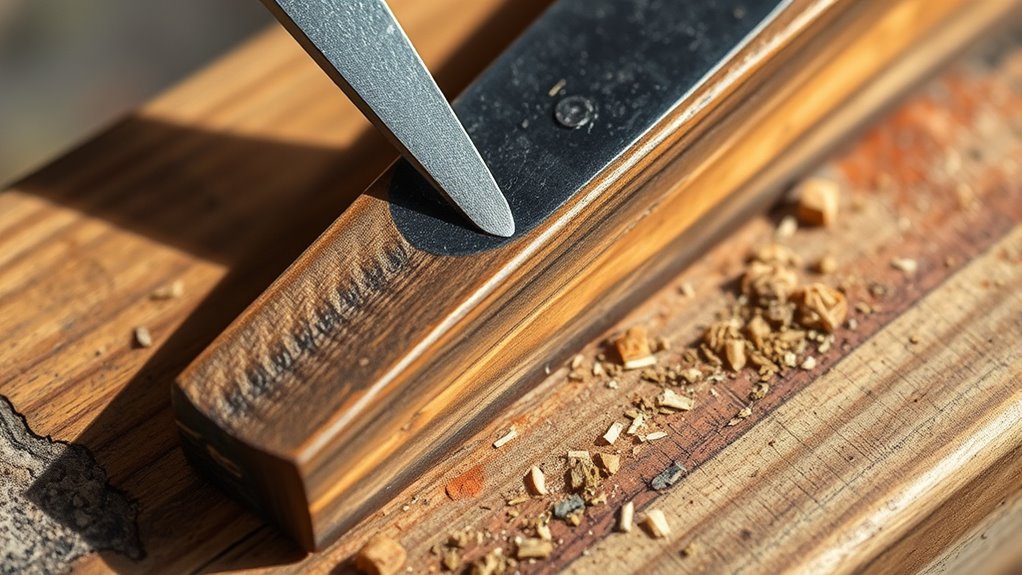
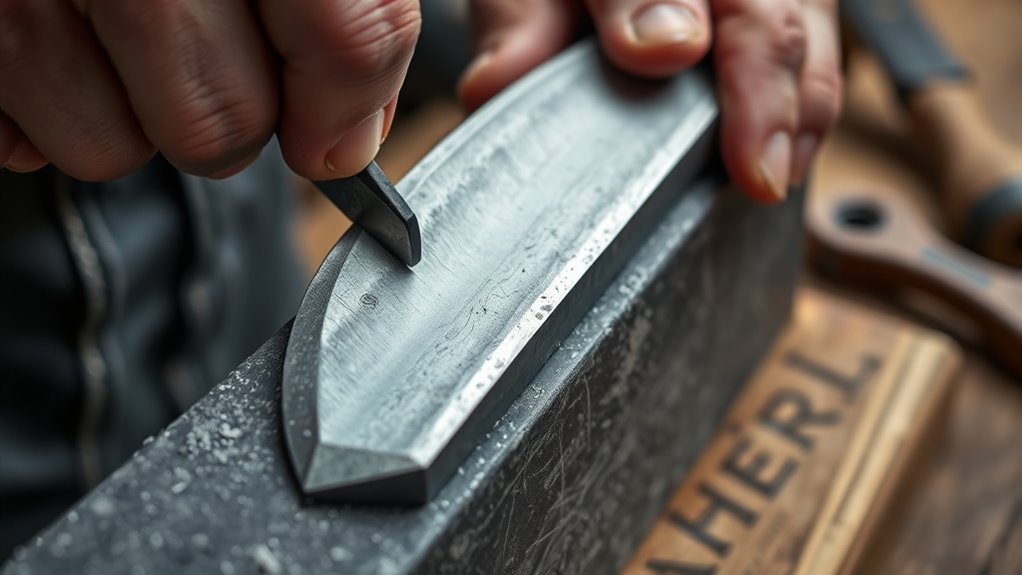
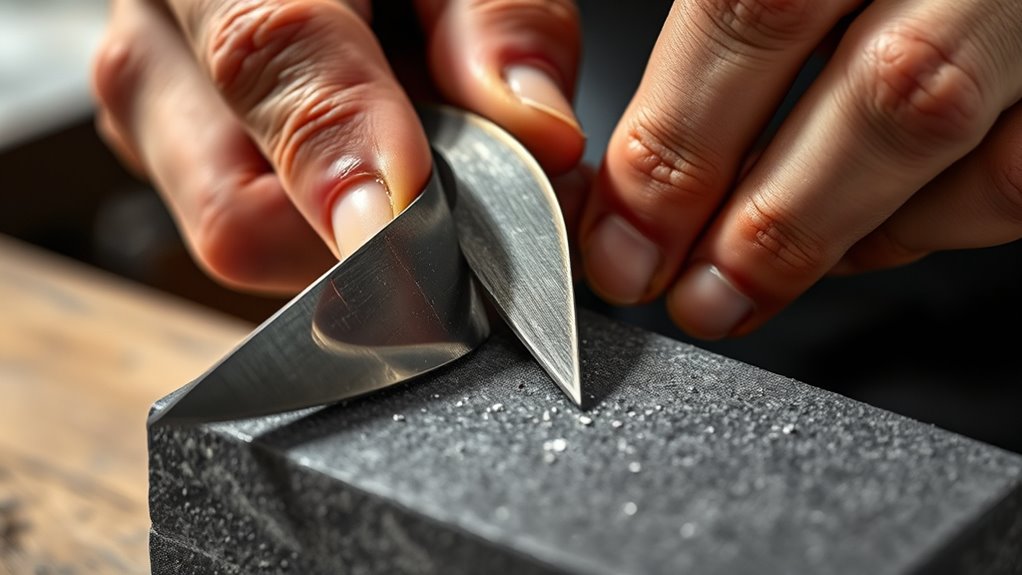
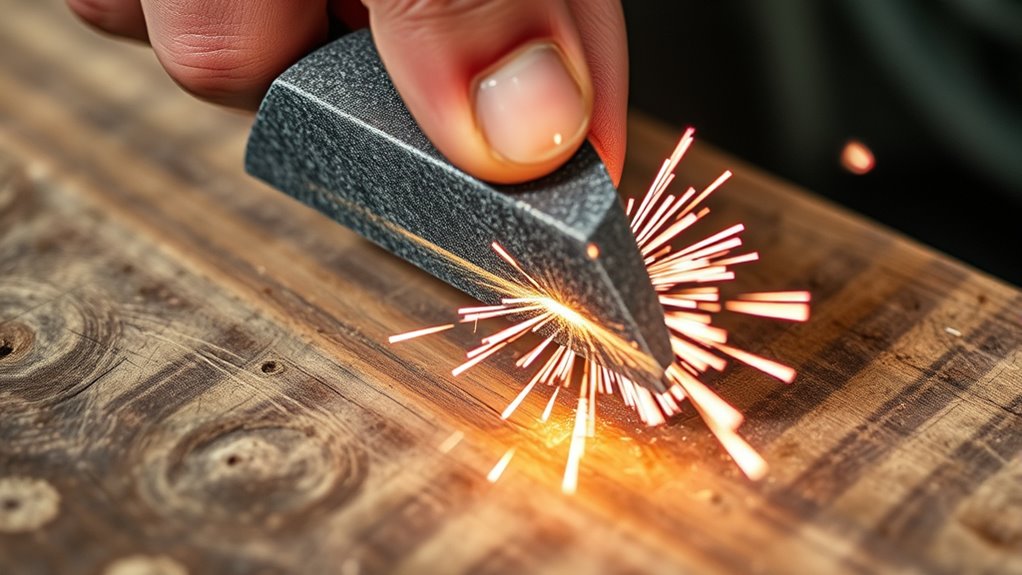
Sharpen the Cutting Edge With a File or Grinder

To effectively sharpen a dull wedge, start by using a file or grinder to carefully reshape the cutting edge. Hold the tool securely and maintain a consistent angle—usually around 20 to 30 degrees—when grinding or filing. Use steady, even strokes to remove nicks, burrs, and uneven spots, ensuring the edge becomes smooth and symmetrical. If you’re using a file, work in one direction along the bevel, applying firm pressure. For a grinder, move the wedge steadily across the wheel, avoiding excessive pressure that could overheat or damage the material. Keep the edge cool by periodically dipping it in water. Focus on restoring the original angle and removing any dull or damaged material, creating a solid foundation for the next sharpening steps.
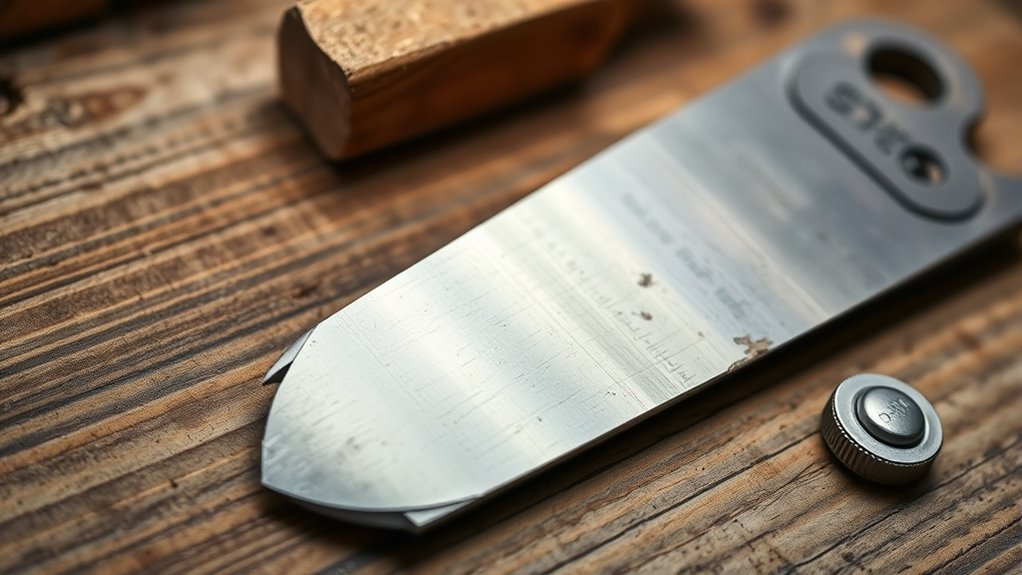
Hone and Polish the Wedge Edge
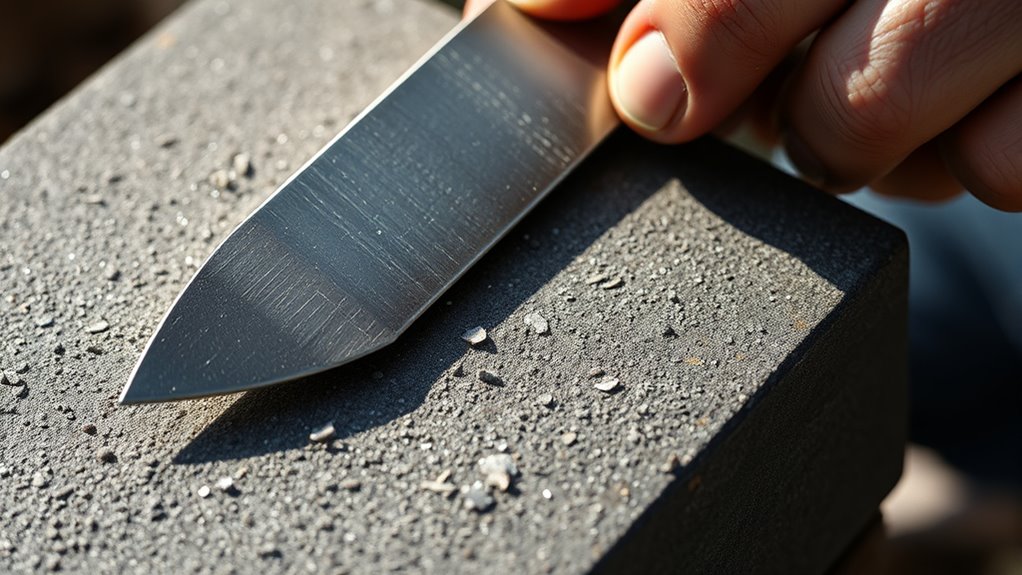
After shaping the edge, honing and polishing help refine it for a razor-sharp finish. Begin by using a honing stone or fine-grit diamond plate. Hold the wedge at a consistent angle, usually around 20 degrees, and gently slide the edge along the stone, applying even pressure. Use smooth, controlled strokes and work from heel to tip. Once the edge feels refined, switch to a finer abrasive or polishing compound to remove any burrs or rough spots. Buff the edge with a soft cloth or leather strop to achieve a smooth, mirror-like finish. This process not only sharpens the edge further but also helps prevent dulling and prolongs the life of your wedge. Proper honing and polishing make a noticeable difference in performance.
Test the Sharpness and Make Final Adjustments
Once you’ve finished honing and polishing the wedge, it’s vital to test its sharpness to guarantee it’s performance-ready. To do this, gently press the edge against a piece of wood or a soft material. If it slices smoothly without much force, you’re on the right track. If it tears or drags, more adjustments are needed. Use the table below to guide your final tweaks:
| Test Method | What to Look For |
|---|---|
| Paper Cut Test | Clean, effortless slice |
| Fingernail Test | Slight catch, no dull scraping |
| Shaving Test | Produces thin shavings easily |
| Edge Inspection | No nicks or dents visible |
| Performance on Workpiece | Smooth, precise cuts |
Adjust your wedge as needed until it passes these tests confidently.
Maintain the Wedge for Long-Term Performance
To keep your wedge performing its best over time, you need to establish simple maintenance habits. Regular cleaning removes debris that can dull the edge, while proper storage prevents unnecessary damage. Additionally, routine checks for sharpness ensure you catch any dullness early and keep your wedge in top shape.
Regular Cleaning Routines
Regular cleaning is essential to keep your wedge performing at its best over time. Dirt, sap, and debris can accumulate on the blade, dulling its edge and reducing effectiveness. To clean it, wipe the wedge after each use with a damp cloth, removing any build-up. For stubborn spots, use a mild soap solution or a soft brush to scrub gently. Avoid harsh chemicals that can damage the metal or handle. Make sure to dry the wedge thoroughly afterward to prevent rust. Regular cleaning not only maintains the sharpness but also extends the lifespan of your tool. Incorporate this routine into your maintenance, especially after heavy use or exposure to moisture, to keep your wedge in top shape and ready for your next task.
Proper Storage Methods
Proper storage is essential for maintaining your wedge’s long-term performance. When you’re done using it, keep your wedge in a dry, sheltered place to prevent rust and corrosion. Avoid leaving it exposed to moisture or extreme temperatures, which can weaken the metal over time. Use a protective cover or sheath if available, especially if you store it in a toolbox or outdoor shed. Storing your wedge in a dedicated, organized space reduces the risk of accidental damage or misplacement. Regularly inspect it for signs of rust or dullness, and address issues promptly. Proper storage helps preserve the edge, prevents deterioration, and ensures your wedge remains effective and ready for use whenever you need it.
Routine Sharpening Checks
How often do you check your wedge for signs of dullness or damage? Regular inspections are key to maintaining peak performance. You should examine your wedge before each use, looking for nicks, dents, or rounded edges. If the edge feels dull or chips are visible, it’s time to sharpen. Even if it looks fine, check for rust or corrosion, which can weaken the metal. Keep a routine schedule—weekly or after a certain number of uses—to prevent buildup of dullness. Use a finger or a small file to test the edge’s sharpness gently. Catching dullness early helps avoid excessive sharpening later and prolongs the life of your wedge. Consistent checks ensure your tool performs efficiently and safely over time.
Frequently Asked Questions
Can I Sharpen a Wedge if It’s Made of Soft Metal?
You can sharpen a wedge made of soft metal, but you need to be gentle to avoid damaging it. Use a fine-grit sharpening stone or a file, applying light pressure. Keep the angle consistent and work slowly to maintain the wedge’s shape. Soft metals tend to dull faster, so regular sharpening helps. Just be cautious not to remove too much material, preserving its strength and effectiveness.
How Often Should I Sharpen My Wedge for Optimal Performance?
Imagine your wedge losing its edge so badly that it struggles to do its job—sounds frustrating, right? To keep it performing at its absolute best, you should sharpen it every few uses or when you notice it’s dulling. Regular maintenance prevents major damage and keeps your work smooth and efficient. Don’t wait until it’s nearly useless—stay ahead, sharpen often, and enjoy flawless results every time.
What Signs Indicate My Wedge Needs Sharpening?
You’ll know your wedge needs sharpening when it no longer digs into the turf cleanly, causing inconsistent ball flights or less spin. If you notice a dull edge, increased effort to hit the ball, or a lack of control around the greens, it’s time to hone. Also, inspect the sole—if it appears chipped or rounded, sharpening can restore its performance. Regular checks ensure your wedge performs at its best.
Is It Safe to Sharpen a Wedge Without Gloves?
In the age of chivalry, knights wore gloves for protection, and today, safety still matters. Sharpening a wedge without gloves isn’t recommended because you risk cuts or injuries from the sharp edge or slipping tools. You might feel confident, but accidents happen fast. Always wear gloves to protect your hands, ensuring you can focus on sharpening properly and safely—just like a knight would safeguard their armor.
Can I Use Household Tools to Sharpen My Wedge Effectively?
You can use household tools to sharpen your wedge, but it’s not ideal. A file or coarse grit sandpaper can do the job if you’re careful. Make sure to secure the wedge firmly and maintain the correct angle. Always wear safety gloves and goggles to protect yourself. For best results, consider investing in a proper sharpening tool designed for wedges, as it’s safer and more effective in restoring your tool’s edge.
Conclusion
Now that you’ve sharpened your wedge, it’s practically invincible—cutting through wood like a hot knife through butter, unstoppable and flawless. With just a little effort, you’ve transformed a dull, ineffective tool into a precision weapon that’ll last for years. Keep up with regular maintenance, and you’ll wield your wedge with the power of a master craftsman, conquering any project that comes your way. Get ready to release your inner woodworking legend!