
To make a DIY cord measuring stick and marker, select a sturdy, non-conductive material like plastic or coated wood, and clearly mark measurement increments with a permanent marker. Add color-coded zones for quick identification, ensuring markings stay legible over time. Keep the device clean and periodically check for accuracy. Properly designed, your tool will improve measurement precision and safety in your electrical projects—keep going to discover more helpful tips.
Key Takeaways
- Use durable, straight materials like wood or plastic for constructing the measuring stick.
- Mark measurements clearly with a permanent marker, including color-coded zones for quick identification.
- Ensure the measuring stick is non-conductive and safe for electrical work by selecting appropriate materials.
- Double-check and calibrate the markings with a standard measuring device before use.
- Regularly maintain and clean the stick to keep markings legible and accurate over time.

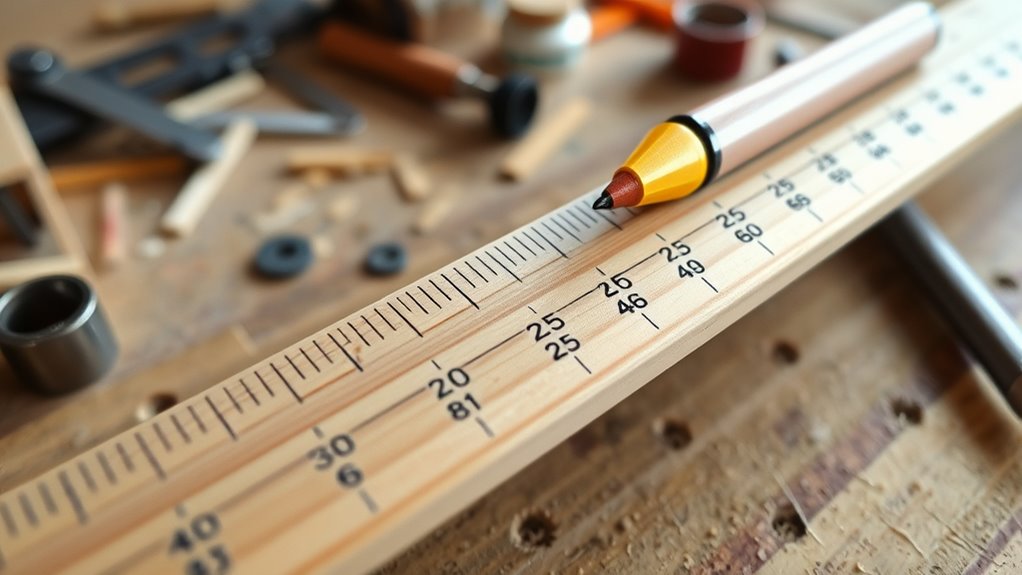
Ever struggled to measure cords accurately and quickly? If so, creating your own DIY cord measuring stick and marker can streamline your tasks and improve measurement precision. The key to a successful homemade tool lies in understanding measurement accuracy. When measuring cords, especially for electrical or safety-sensitive applications, precision isn’t just a convenience—it’s a necessity. An accurate measuring stick ensures you know exactly how long your cords are, helping you avoid overbuying, underestimating, or creating unsafe slack. When designing your measuring tool, prioritize clarity in markings, sturdy construction, and consistency across measurements. Using a durable, straight piece of wood or plastic as your base allows you to mark increments clearly, preventing misreading or misalignment. Remember, the goal is to have a reliable reference that can be reused multiple times without wear or distortion. Safety considerations also play a *crucial* role when working with cords, especially electrical ones. *Ensure* your measuring stick is made from non-conductive materials, such as plastic or coated wood, to prevent accidental electrical shocks during measuring. Keep your workspace free from moisture and conductive debris, and always unplug cords before measuring to reduce risks. When marking your measurements, use a permanent, legible marker that won’t smudge or fade over time. This *vital* to you can quickly identify measurements in various lighting conditions and prevent errors. It’s also helpful to incorporate measurement standards into your markings to ensure consistency with industry practices. It’s wise to double-check your markings with a known standard or a reliable measuring device to confirm accuracy before relying on your homemade tool. Creating a measuring stick also involves paying attention to detail—mark each increment carefully, and consider adding color-coded zones for quick visual reference of different lengths. This aids in faster identification and reduces the chance of errors during installation or adjustments. Additionally, maintaining your measuring stick is *crucial*; periodically check for wear, recalibrate if necessary, and clean it regularly to keep markings visible. By taking these steps, you’ll develop a tool that enhances measurement accuracy and promotes safety in all your cord-related tasks. Remember, a well-made measuring stick isn’t just about convenience; it’s about *ensuring* your work is precise, safe, and efficient. With a little effort, you can craft a reliable, reusable tool that saves you time and minimizes mistakes. Focus on sturdy construction, clear markings, and safety features, and you’ll have a DIY cord measuring stick that becomes an essential part of your toolkit. Once you get used to it, you’ll wonder how you ever managed without it, especially when quick, accurate measurements are needed in a pinch.
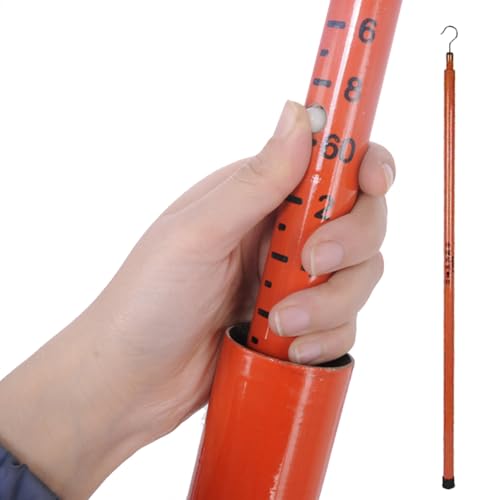
Adjustable Height Measuring Stick for Electrical Work – 32.8ft Telescoping Rod, Epoxy Resin Tower Ruler for Commercial Linemen, Substation Construction & Forestry Use
- Telescopic Length: Extends from 6 to 18 meters
- Compact Storage: Contracts to 4.9 feet for easy transport
- Durable Epoxy Poles: Impact-resistant and weatherproof
As an affiliate, we earn on qualifying purchases.
As an affiliate, we earn on qualifying purchases.
Frequently Asked Questions
What Materials Are Best for Making a Durable Measuring Stick?
You should choose a hardwood like oak or maple for your measuring stick because they’re durable and resistant to wear. Use quality wood selection to make certain of longevity. Apply clear, waterproof markings with marking techniques such as permanent marker or paint for visibility and durability. This combination guarantees your measuring stick withstands regular use, remains precise, and maintains its integrity over time.
How Can I Customize Markers for Different Cord Types?
You can customize markers for different cord types by using color coding and label customization. Choose bright, distinct colors for each cord type, then apply corresponding paint or permanent markers directly on your measuring stick. Add clear labels or symbols beside each color to avoid confusion. This way, you quickly identify the right cord length and type, making your measuring process more efficient and organized.
What Safety Precautions Should I Take During the DIY Process?
Think of safety as your guiding light through the DIY maze. You should wear safety gear like gloves and goggles to shield yourself from potential hazards. Set up your workspace in a well-ventilated area, free from clutter, to keep accidents at bay. Keep sharp tools and hot glue guns out of reach, and stay focused on your task. These precautions turn your project into a safe, enjoyable adventure rather than a risky endeavor.
How Do I Ensure Accuracy in My Measurements?
To guarantee accuracy in your measurements, use proper measurement techniques by keeping the measuring tape straight and steady. Regularly check calibration methods by comparing your measurements with a known standard or ruler to spot any inaccuracies. Always measure at eye level to avoid parallax errors, and double-check your measurements for consistency. These steps help maintain precision and reliability in your measurements, guaranteeing your project turns out just right.
Can I Make a Collapsible or Portable Measuring Stick?
Think of your measuring stick as a flexible wand that folds into your pocket. Yes, you can make a collapsible or portable design by adding sections that slide or fold, making it easy to carry. Use durable materials like lightweight metal or sturdy plastic, and incorporate locking mechanisms to keep it stable when extended. This way, your measuring tool becomes a handy companion, ready to unfold whenever you need it.
Conclusion
Now that you’ve crafted your own cord measuring stick and marker, you’re ready to tame those tangled tangles like a master navigator steering through choppy waters. With each measurement, you’ll chart a course to neatness and organization, turning chaos into clarity. Think of your DIY tool as a trusted compass, guiding your hands with precision and flair. So, go ahead—let your newfound measuring prowess turn everyday cords into a well-orchestrated symphony of order.