
To change hydraulic fluid, start by gathering your tools and preparing a safe, clean workspace. Safely lift and support the equipment before draining the old fluid through the drain plug. Replace the filters as needed, then refill with the recommended new fluid. Operate the system to bleed out trapped air, check for leaks, and guarantee everything runs smoothly. Proper cleanup and disposal are vital—if you want detailed steps, continue to explore the full process.
Key Takeaways
- Gather necessary tools, safety gear, and ensure work area is clean and well-ventilated.
- Drain old hydraulic fluid by opening the drain plug and collecting it safely.
- Replace hydraulic filters to maintain fluid cleanliness and system efficiency.
- Refill the system with the correct new hydraulic fluid, then bleed air by operating controls.
- Verify all fittings are secure, check for leaks, clean up spills, and document maintenance.
Gather Necessary Tools and Materials
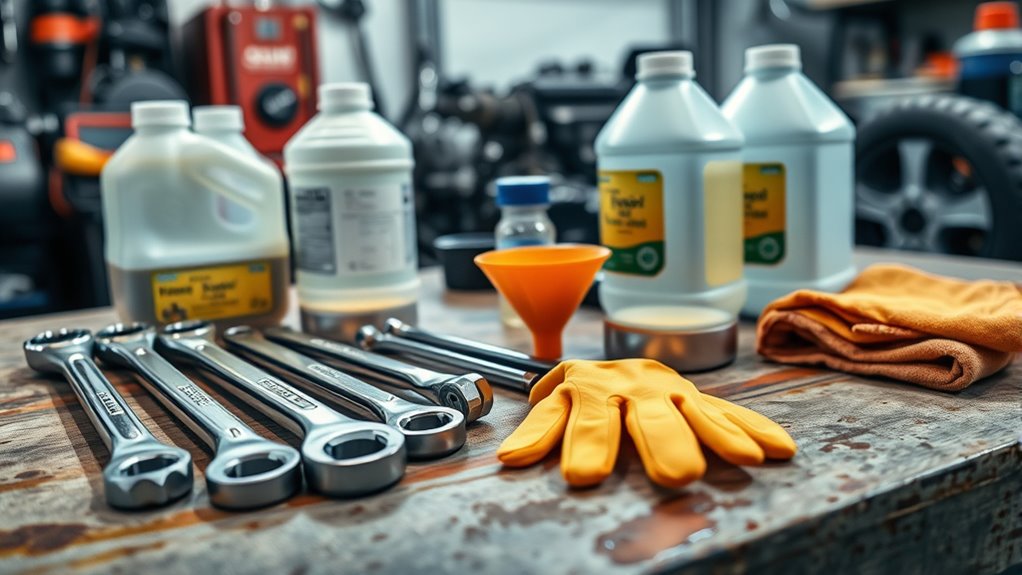
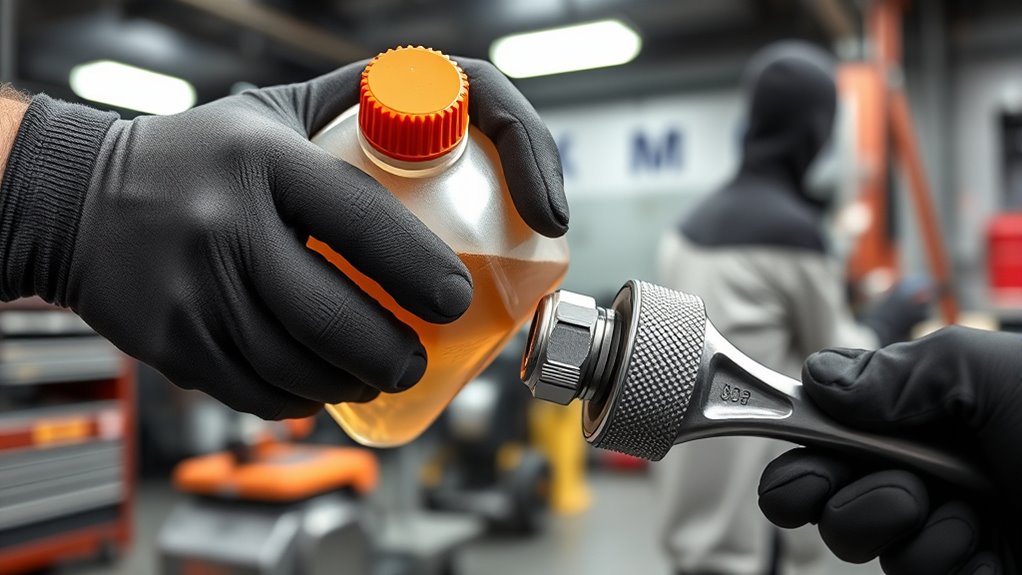
Before you begin changing the hydraulic fluid, gather all the tools and materials you’ll need to guarantee the process goes smoothly. You’ll need a wrench or socket set to open drain plugs and fittings, and a fluid catch pan to collect the old fluid safely. Have new hydraulic fluid on hand—make sure it matches your equipment specifications. You’ll also need a funnel for pouring, rags or shop towels for cleanup, and gloves to protect your skin from hot or contaminated fluid. A flashlight can help you see clearly in tight spaces. Double-check your tools and supplies before starting to avoid interruptions. Being prepared with everything you need ensures a straightforward, efficient fluid change and minimizes potential mess or delays.
Prepare the Work Area

To guarantee a safe and efficient hydraulic fluid change, you need to prepare your work area thoroughly. Clear the space of any obstacles or clutter that could cause accidents or delays. Ensure the area is well-ventilated and has adequate lighting so you can see what you’re doing clearly. Place drip pans or absorbent materials under the equipment to catch any spilled fluid. Keep your tools and containers nearby for easy access. If possible, set up barriers or warning signs to alert others of the maintenance activity. Make sure you have a fire extinguisher close by, as hydraulic fluid is flammable. Taking these steps helps create a safe environment and streamlines the fluid change process. Incorporating good lighting can help you detect leaks or spills early and ensure precision during the task. Additionally, being aware of fluid compatibility is essential to prevent damage to your equipment and ensure optimal performance. To further enhance safety and efficiency, consider organizing your tools and supplies using vertical storage solutions to keep everything within reach and reduce clutter.
Safely Lift and Support the Equipment
When lifting and supporting equipment, you need to use proper techniques to prevent accidents. Make sure you secure the equipment firmly before working underneath or around it. Doing this guarantees your safety and keeps the worksite hazard-free. Additionally, understanding the importance of ethical labor practices can help ensure that the equipment was produced under fair and safe working conditions. Recognizing best practices in equipment maintenance can further enhance safety during hydraulic fluid changes. Incorporating industry safety standards into your procedures is also vital for maintaining a secure work environment. Staying informed about automation in industry can also help identify new safety technologies that enhance worker protection.
Proper Lifting Techniques
Proper lifting techniques are essential to prevent injury and protect the equipment during maintenance. Always assess the weight and stability of the component before lifting. Use your legs, not your back, to lift heavy parts—bend your knees and keep your back straight. Keep the load close to your body to reduce strain. If the object is too heavy or awkward, get help or use appropriate lifting tools like hoists or jacks. Secure the equipment with supports or stands before working underneath to prevent accidental drops. Avoid quick or jerky movements that could cause slips or loss of control. Take your time and plan your lift carefully. Proper techniques guarantee your safety and prevent damage to the equipment during hydraulic fluid changes. Additionally, understanding body mechanics can further enhance safe lifting practices. Recognizing the importance of proper equipment support also helps prevent accidents and ensures stability during maintenance tasks. Regularly inspecting your bicycle tools and workspace can further reduce the risk of mishaps during maintenance procedures. Being aware of mechanical stability can further improve safety during lifting and support activities. Incorporating training and proper technique can significantly reduce the risk of injury and ensure efficient maintenance.
Secure Equipment Safely
Before working on hydraulic systems, always secure the equipment to prevent accidental movement or collapse. Properly supporting the equipment minimizes injury risk and equipment damage. To do this effectively:
- Use jack stands or supports rated for the equipment’s weight, placing them on a stable, level surface.
- Engage wheel chocks or blocks on the wheels to prevent rolling.
- Apply the parking brake or lockout/tagout devices to keep the machinery stationary.
- Consider tuning modifications that can improve the overall safety and performance of the vehicle during maintenance. Monitoring market trends can also help anticipate equipment needs or potential issues related to component performance.
- Always verify the support points are under solid points like frame rails or designated lift points. Double-check stability before starting work. Implementing proper support techniques is essential to prevent accidents and ensure safety during fluid changes. Using appropriate support methods can further enhance safety and stability. This step guarantees safety and keeps your work environment secure, reducing the chance of accidents during fluid changes.
Drain the Old Hydraulic Fluid
Before draining the fluid, make sure the equipment and area are prepared and clear of obstructions. Locate the drain plug carefully to avoid spills or damage. Once the fluid is released, collect it in a proper container and dispose of it according to local regulations. Be sure to use appropriate disposal methods to handle the old hydraulic fluid safely and in compliance with environmental standards.
Prepare Equipment and Area
To effectively drain the old hydraulic fluid, start by securing the equipment and protecting your work area. First, move the machine to a flat, stable surface and shut off the power. Second, place drip pans or catch containers underneath drain points to catch the fluid. Third, cover nearby surfaces and components with rags or plastic sheets to prevent spills and stains. Make sure you wear gloves and safety goggles for protection. Clear the surrounding area of unnecessary tools or objects to avoid accidents. Check that the area is well-ventilated, especially if you’re working indoors. Taking these precautions ensures a safe, clean workspace and makes draining the fluid more efficient. Proper preparation minimizes mess and helps you stay organized during the process.
Locate Drain Plug
Locate the drain plug by consulting the equipment’s service manual or inspecting the hydraulic reservoir and sump areas. The drain plug is typically positioned at the lowest point to allow effective draining of the fluid. Look for a bolt or plug with a gasket or washer that can be removed easily. Before proceeding, verify the area around the drain plug is clean to prevent debris from contaminating the hydraulic system. Use a wrench to loosen the plug carefully, catching any residual fluid in a drain pan placed underneath. Confirm that the system is depressurized if necessary, and be prepared for some fluid to flow out once the plug is removed. Properly identifying the drain plug is essential for a smooth, clean fluid change process.
Collect and Dispose Properly
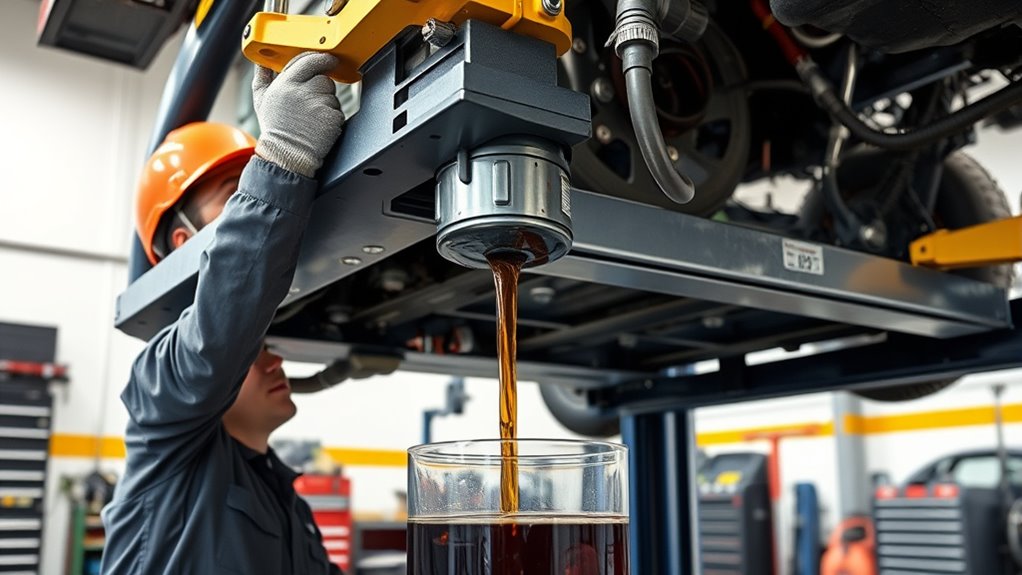
Once you’ve loosened and removed the drain plug, allow the old hydraulic fluid to flow into a suitable container. Make sure it’s clean and leak-proof. As the fluid drains, keep the container steady to prevent spills. Once the flow slows, double-check the drain plug’s tightness before moving on. Proper disposal is vital to protect the environment. Here’s what to do:
- Transfer the used fluid to a sealed, labeled container designed for hazardous waste.
- Take the container to a certified recycling or disposal facility—never pour it down drains or onto the ground.
- Clean any spilled fluid immediately with absorbent materials, and dispose of those properly.
Handling fluid responsibly keeps you compliant and safeguards the environment.
Replace Hydraulic Filters

Have you ever wondered why replacing hydraulic filters is vital for maintaining ideal system performance? Hydraulic filters trap dirt, metal particles, and debris that can damage components and reduce efficiency. Over time, filters become clogged, restricting fluid flow and increasing system strain. When filters are dirty or clogged, hydraulic fluid can’t circulate properly, leading to decreased power, increased wear, and potential system failure. Regularly replacing filters ensures contaminants are removed, preserving fluid cleanliness and system longevity. It’s a simple but essential step to keep your hydraulic system running smoothly. Always follow the manufacturer’s recommendations for filter types and replacement intervals. Using the correct filters prevents leaks and maintains optimal pressure, helping your equipment perform reliably and avoiding costly repairs down the line.
Refill With Fresh Hydraulic Fluid

After replacing the filters, it’s vital to refill your hydraulic system with fresh, clean fluid to guarantee peak performance. First, locate your fill port and remove the cap. Second, using a funnel, pour the recommended hydraulic fluid into the reservoir, ensuring you don’t overfill. Third, check the fluid level with the dipstick or sight gauge, adding more if necessary until it reaches the marked level. Keep in mind, using the correct type and viscosity of hydraulic fluid is essential for maximum operation. Once filled, securely replace the cap and wipe away any spills. Properly refilling ensures your system is ready for the next step, which involves removing air and ensuring fluid circulation.
Bleed the Hydraulic System

With the hydraulic system filled and the cap securely in place, the next step is to eliminate any trapped air to guarantee smooth operation. Start the engine or pump to build pressure in the system. Slowly operate the hydraulic controls through their full range of motion—lifting, lowering, and swinging—to move fluid and force air out. Watch the hydraulic fluid reservoir; as air escapes, the fluid level might drop, so top it off as needed. Continue cycling the controls until you see steady, bubble-free fluid flow. This process ensures that all air pockets are expelled, preventing erratic or sluggish performance. Once you’re confident the system is free of air, you can move on to the next step.
Check for Leaks and Proper Operation

Before operating the hydraulic system fully, it’s essential to verify for leaks and make sure everything works correctly. Start by inspecting all connections, hoses, and fittings for any signs of fluid seepage or drips. Next, run the system at low pressure and observe its operation closely. Pay attention to these three key points:
Always inspect connections and run the system at low pressure before full hydraulic operation.
- Check for fluid leaks around fittings and hoses.
- Listen for unusual noises or vibrations during operation.
- Confirm that the hydraulic cylinder moves smoothly without hesitation or jerking.
If you notice leaks, tighten fittings or replace damaged hoses immediately. Guarantee all moving parts operate seamlessly, and there are no fluid loss or irregular sounds. Doing this step thoroughly helps prevent future issues and guarantees safe, efficient system performance.
Clean Up and Dispose of Old Fluid Properly

Properly cleaning up and disposing of old hydraulic fluid is essential to protect the environment and maintain safety. First, wear gloves and eye protection to avoid skin and eye contact with the contaminated fluid. Use a catch pan or container to collect the old fluid during the change. Never pour it down drains, onto the ground, or into water sources. Instead, transfer the used fluid into a sealed, labeled container. Many local facilities accept used hydraulic fluid for recycling or proper disposal. Be sure to check your area’s regulations beforehand. Cleaning tools and spills promptly prevents environmental contamination. By handling the old fluid responsibly, you reduce pollution risks and ensure a safe workspace for yourself and others. Proper disposal supports environmental protection and complies with legal requirements.
Frequently Asked Questions
How Often Should Hydraulic Fluid Be Changed for Optimal Performance?
You should change your hydraulic fluid based on your equipment’s usage and manufacturer’s recommendations. Typically, it’s advisable to inspect the fluid every 500-1,000 hours of operation and change it every 2,000-4,000 hours or annually. Regularly monitoring fluid quality helps prevent system wear and guarantees peak performance. Always follow your equipment’s manual for specific intervals, and consider changing fluid sooner if it appears dirty or contaminated.
Can I Use Any Type of Hydraulic Fluid as a Replacement?
Think of hydraulic fluid as the lifeblood of your system—using the wrong type is like giving your engine the wrong fuel. You can’t just pick any hydraulic fluid off the shelf; it needs to match your equipment’s specifications. Always check your manual or consult with the manufacturer. Using incompatible fluid can cause damage, leaks, or system failure, so choose wisely to keep things running smoothly.
What Are the Signs Indicating the Need for a Hydraulic Fluid Change?
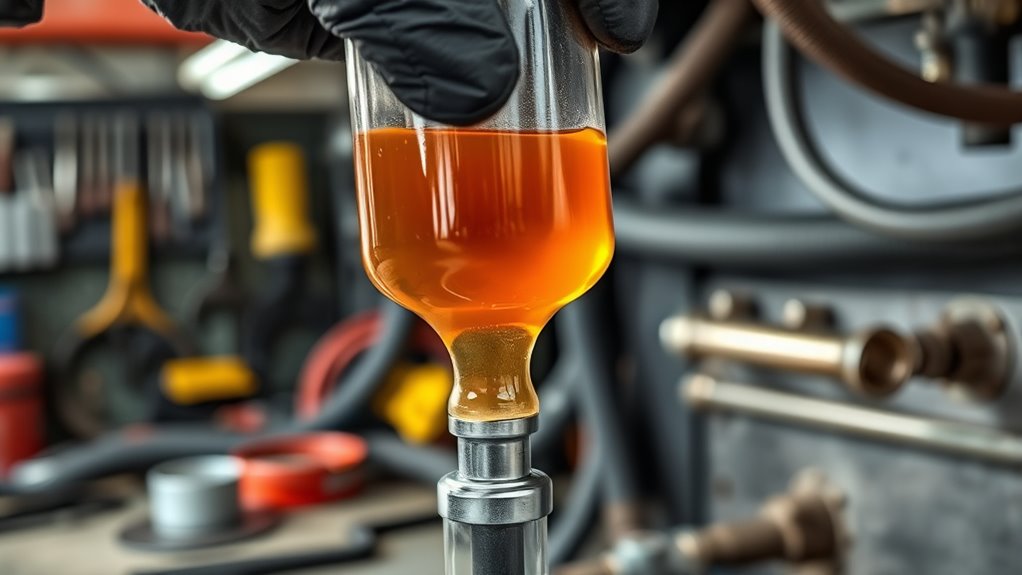
You’ll know it’s time to change your hydraulic fluid when you notice decreased system performance, such as sluggish movement or inconsistent operation. Strange noises, overheating, or increased fluid leaks are also signs. Additionally, if the fluid appears dark, cloudy, or contains debris, it’s a clear indicator you need a change. Regularly checking fluid levels and condition helps prevent damage and keeps your machinery running smoothly.
Are There Safety Precautions Specific to Different Types of Equipment?
You might think safety precautions are similar across equipment types, but they vary considerably. Always check the manufacturer’s guidelines for each machine, wearing appropriate PPE like gloves and goggles. Make sure you disconnect power sources before maintenance, and work in well-ventilated areas. Don’t overlook specific hazards like high-pressure systems or hot components. Following tailored safety measures protects you from injuries and equipment damage, making your work safer and more effective.
How Long Does the Entire Hydraulic Fluid Changing Process Typically Take?
The entire hydraulic fluid changing process usually takes between 2 to 4 hours, depending on your equipment’s size and complexity. You’ll need to drain the old fluid, replace filters, and refill with fresh fluid. Be sure to follow safety precautions and manufacturer instructions to avoid mistakes. Planning ahead and gathering tools beforehand can help you complete the task efficiently without rushing, ensuring peak equipment performance afterward.
Conclusion
Changing your hydraulic fluid is like giving your equipment a fresh breath of life. By following these steps, you’re ensuring smooth operation and preventing costly repairs. Think of it as tending to a garden—you’ll reap the rewards of reliable performance and longevity. Just remember, a little maintenance now saves a lot of trouble later. Keep your machinery humming happily, and it’ll serve you well for years to come.