
To replace a log splitter wedge safely, start by turning off and unplugging the machine, then gather the right tools and safety gear like gloves and goggles. Secure the wedge firmly before carefully removing it using the proper tools, avoiding excessive force. Inspect the new wedge for damage, verify it fits correctly, and install it straight and tight. Test the splitter gently; if you follow these steps, you’ll master a safe replacement process and avoid accidents.
Key Takeaways
- Always disconnect power and unplug the log splitter before beginning removal or installation.
- Wear protective gear like gloves and safety glasses to prevent injuries during handling.
- Secure the wedge firmly with clamps or a vise to prevent slipping while removing or installing.
- Inspect the new wedge for damage and ensure it matches the model’s specifications before installation.
- Test the log splitter at low pressure after installation, wearing safety gear, to confirm proper operation before full use.

maXpeedingrods 4-Way Log Splitter Wedge for Swisher Branded 22 28 34 ton Log splitters
- Compatibility: Fits Swisher 22, 28, 34-ton splitters
- Material: Made of durable, high-hardness steel
- Surface Finish: Powder-coated for rust and scratch resistance
As an affiliate, we earn on qualifying purchases.
As an affiliate, we earn on qualifying purchases.
Gathering the Necessary Tools and Safety Gear

Before you begin replacing a log splitter wedge, it is vital to gather all the necessary tools and safety gear. Start by collecting the right wedge types, guaranteeing you have the correct shape and size for your splitter. Safety training is essential, so wear protective gloves, safety glasses, and steel-toed boots to prevent injuries. You might also need a hammer, pry bar, and a wrench or socket set to remove and install the wedge properly. Having these tools ready keeps the process smooth and minimizes risks. Remember, understanding the different wedge types helps you choose the right one, while safety gear protects you from potential hazards. Additionally, familiarizing yourself with projector technology can help you better understand the importance of selecting the correct tools and equipment for specific tasks. Proper knowledge of exfoliation benefits ensures you work effectively and safely during the wedge replacement process. Being aware of Free Floating mechanisms can also assist in handling your tools correctly and safely. Gaining a basic understanding of wedge installation techniques can further enhance your safety and efficiency during the project. Furthermore, understanding the role of automation in business can provide insights into streamlining your project workflow for better efficiency.
Preparing the Log Splitter for Wedge Replacement

Before replacing the wedge, make certain the log splitter is turned off and unplugged to prevent accidents. Gather all necessary tools and safety gear so you’re ready to work efficiently and safely. Taking these steps will help you prepare properly for a smooth wedge replacement process. Additionally, reviewing safety precautions related to machinery handling can further reduce risks during the process.
Safety Precautions Needed
To safely replace the wedge on your log splitter, you must first guarantee the machine is properly prepared. Ensure the splitter is turned off, unplugged, and stabilized to prevent accidental movement. Wearing personal protective equipment like gloves, safety glasses, and steel-toed boots is essential for safe handling. Always double-check that the energy source is disconnected to avoid injury. Use this table to understand the importance of safety:
| Emotion | Reason |
|---|---|
| Confidence | You’re protected from injury, making the task easier. |
| Calmness | Proper prep reduces stress and mistakes. |
| Security | Knowing the machine won’t move keeps you safe. |
| Satisfaction | Completing the job safely boosts confidence. |
Prioritize these precautions to make your wedge replacement safe and effective. Additionally, understanding safety precautions is crucial for preventing accidents during maintenance tasks. Being aware of potential hazards related to log splitter repair can further enhance your safety measures. For example, inspecting the machine components before starting work can help identify any issues that might pose risks, and consulting the manufacturer’s guidelines can provide specific safety instructions. Also, being familiar with industry standards ensures you follow best practices for safe operation.
Tools and Equipment Prep
Gather all the necessary tools and equipment before starting the wedge replacement to guarantee a smooth process. Review your maintenance checklist to verify you have the right items, such as a socket set, pry bar, hammer, and safety gear. Inspect the tools for wear and tear, replacing any faulty equipment. Preparing your workspace is equally important; clear the area and secure the log splitter. Familiarize yourself with troubleshooting tips, like identifying stuck wedges or damaged parts, so you’re ready for potential issues. Having everything prepared minimizes delays and keeps the process safe. Double-check that the power source is disconnected before proceeding. Proper tools and equipment prep set the foundation for a safe, efficient wedge replacement, reducing risks and ensuring a successful repair. Additionally, understanding common log splitter maintenance procedures can help prevent future issues and prolong the equipment’s lifespan. It’s also wise to review safety protocols to ensure all safety measures are followed throughout the procedure. Taking the time to prepare your tools properly enhances overall safety and efficiency during the replacement process. For example, familiarizing yourself with proper handling techniques can prevent injuries and damage to the equipment. Remember that proper safety precautions can significantly reduce the risk of injury during maintenance work.
Removing the Old Wedge Carefully and Safely

Before removing the old wedge, make sure you wear protective gear like gloves and safety glasses. Secure the wedge firmly to prevent slipping, and use the right tools carefully to avoid injury. Taking these precautions guarantees you can remove the wedge safely and effectively. Additionally, ensuring proper support and stability during the process can help prevent accidents. Proper maintenance practices can also extend the lifespan of your equipment and prevent unexpected failures. Being aware of divorce costs and planning can also help you prepare financially for other home repairs or projects. Recognizing recurring angel numbers can offer guidance and reassurance throughout challenging tasks. Incorporating biodiversity conservation principles into your workspace can also promote a safer and more eco-friendly environment.
Wear Protective Gear
Because removing a log splitter wedge involves handling sharp edges and heavy components, wearing protective gear is vital for your safety. Start by donning protective clothing to shield your skin from potential cuts or splinters. Safety glasses are essential to protect your eyes from flying debris or accidental slips. Gloves can provide extra grip and safeguard your hands, but ensure they are snug-fitting and flexible. Avoid loose clothing or jewelry that could get caught in moving parts. Always inspect your gear before starting, making sure everything is in good condition. Proper protective gear minimizes injury risk, allowing you to focus on the task at hand safely and efficiently. Prioritize your safety to prevent accidents and complete the wedge removal smoothly. Empowering families through safety awareness helps ensure a positive experience during maintenance tasks.
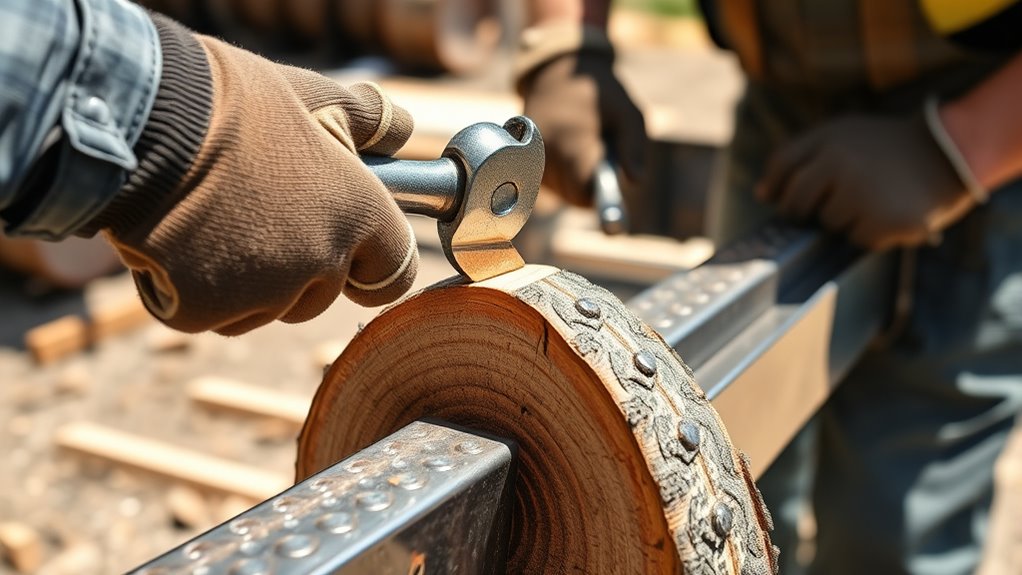
Secure the Wedge Firmly
To remove the old wedge safely, it’s essential to secure it firmly in place to prevent slipping or sudden movement. Start by ensuring the wedge is properly anchored, which helps maintain stability during removal. Check the wedge’s alignment to confirm it’s straight and not tilted, as misalignment can cause it to shift unexpectedly. Use clamps or a vise if necessary to hold the wedge securely, especially if it’s stuck or loose. Wedge anchoring ensures the wedge stays in position as you loosen or pry it out, reducing the risk of injury. Take your time to verify the wedge is steady before applying force. Proper wedge alignment and firm anchoring are key to removing it safely and preparing for a new wedge installation.
Use Proper Tools Carefully
Using proper tools carefully is essential to remove the wedge safely and avoid damage or injury. Before starting, inspect your tools for any signs of wear or damage, practicing good tool maintenance to ensure effectiveness. Use the correct tools, such as a hammer or chisel, to loosen the wedge without damaging the log splitter’s surface. Pay close attention to wedge alignment; misaligned wedges can cause uneven removal and potential safety hazards. When prying, apply steady, controlled pressure rather than forceful blows that could bend or break tools. Carefully work around the wedge, avoiding slips that could cause injury. Properly maintained tools will perform better and reduce the risk of accidents, ensuring a safer, more efficient removal process.
Inspecting and Preparing the New Wedge for Installation
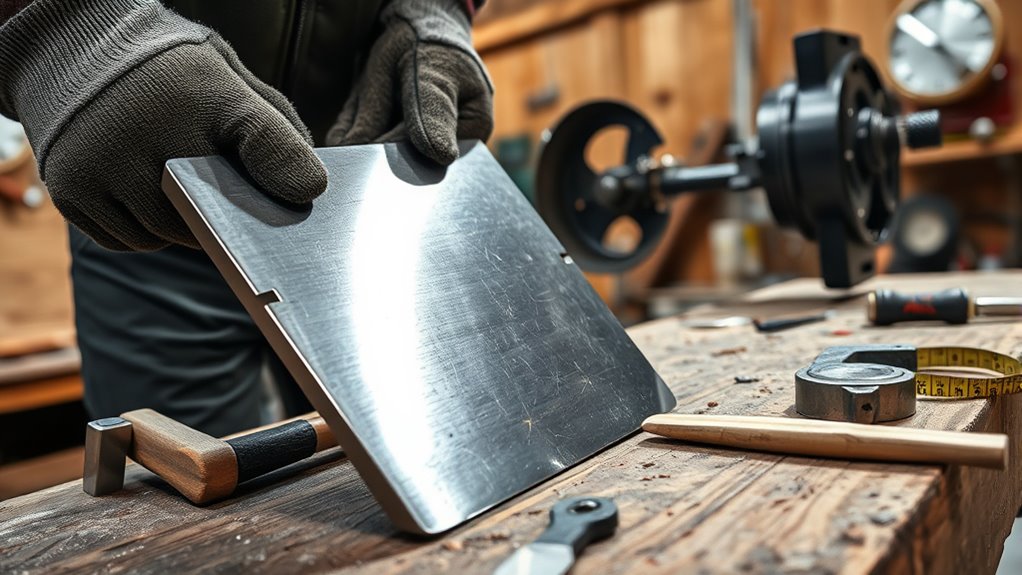
Before installing the new wedge, it’s essential to carefully inspect it for any defects or damage that could compromise safety or performance. Begin by examining the wedge’s material selection to ensure it’s suitable for the job—steel alloys are common for their durability. Check for cracks, warping, or corrosion that might weaken the wedge. Look closely at the edges and the contact surfaces for any signs of damage or deformity. Confirm that the wedge’s dimensions match the original or manufacturer’s specifications for your splitter. If you notice any flaws during the inspection for damage or questions about the material quality, don’t proceed with installation. Using a damaged or unsuitable wedge can lead to safety hazards and inefficient splitting. Proper inspection ensures safe, reliable operation.
Installing the New Wedge Properly and Securing It
Once you’ve confirmed that the new wedge is free of defects and matches the required specifications, you can proceed with installing it. First, ensure proper wedge alignment by carefully positioning it in the splitter’s housing, so it sits evenly and straight. Next, secure the wedge using the appropriate securing fasteners, tightening them firmly to prevent movement during operation. To make sure everything is set correctly, consider these steps:
- Check that the wedge is aligned perpendicular to the splitter’s surface
- Tighten securing fasteners gradually in a crisscross pattern for even pressure
- Inspect the wedge’s position after initial tightening to confirm it’s secure and properly aligned
Proper installation prevents future issues and guarantees safe, efficient splitting.
Testing the Log Splitter After Replacement

After installing the new wedge, it is essential to test the log splitter to make sure it operates safely and effectively. Use testing techniques such as running the splitter at low pressure first, then gradually increasing force. Check the wedge material for proper fit and stability, making sure it doesn’t wobble or shift. Observe the splitting process closely, looking for smooth, consistent cuts. Here’s a visual to help:
| Step | Action |
|---|---|
| 1 | Power on and test at low pressure |
| 2 | Observe wedge and splitting speed |
| 3 | Increase pressure gradually |
| 4 | Confirm no unusual vibrations or noise |
This guarantees your wedge material is secure and operating correctly before full use.
Frequently Asked Questions
How Often Should I Replace the Log Splitter Wedge?
You should check your log splitter wedge regularly as part of your maintenance schedule. Typically, the wedge’s longevity depends on usage and material quality, but inspect it for signs of wear or damage every few months if you use it frequently. Replace the wedge when it becomes chipped, cracked, or notably worn to guarantee safe and efficient splitting. Proper maintenance helps extend its lifespan and keeps your splitter functioning effectively.
Can I Use a Different Wedge Material Than the Original?
Did you know that choosing the right wedge material can increase its lifespan by up to 50%? When considering a different wedge material, verify it’s compatible with your log splitter’s specifications. Always prioritize safety precautions, like wearing gloves and eye protection, and check wedge material compatibility before switching. Using an unsuitable material can cause accidents or damage, so confirm that the new wedge meets the manufacturer’s standards for safe and effective operation.
What Are Signs That My Wedge Needs Replacing?
You’ll know your wedge needs replacing if you notice cracks, chips, or excessive wear. Regular maintenance tips include inspecting the wedge before each use and keeping it clean. Safety precautions are vital—never force the wedge or attempt repairs if it’s damaged. If signs of damage appear, replace the wedge promptly to avoid accidents and guarantee efficient splitting. Staying vigilant helps maintain safety and prolongs your equipment’s lifespan.
Is It Necessary to Lubricate the Wedge During Installation?
Think of installing your wedge like easing a key into a lock; proper lubrication is vital. It reduces friction, prevents damage, and guarantees smooth installation. Using the right lubrication during installation techniques helps the wedge seat properly and avoids future issues. Skipping this step can cause unnecessary wear. So, yes, lubricating the wedge during installation isn’t just a good idea – it’s essential for a safe, effective replacement.
How Long Does a Typical Wedge Replacement Process Take?
Replacing a log splitter wedge typically takes about 30 minutes to an hour, depending on your experience and the equipment. To guarantee safety precautions and proper tool maintenance, follow manufacturer instructions carefully. Keep the work area clear, wear protective gear, and use the right tools. Taking your time helps prevent accidents and ensures the new wedge is installed securely, making your log splitter safe and efficient for future use.
Conclusion
Replacing a log splitter wedge is like tending a delicate garden—each step requires care and attention. With the right tools and safety measures, you can smoothly swap out the wedge and keep your splitter running like a well-oiled machine. Remember, patience and precision are your best tools. When done correctly, you’ll have your splitter back to splitting logs effortlessly, ready to stand tall like a mighty oak standing strong against the winds of time.