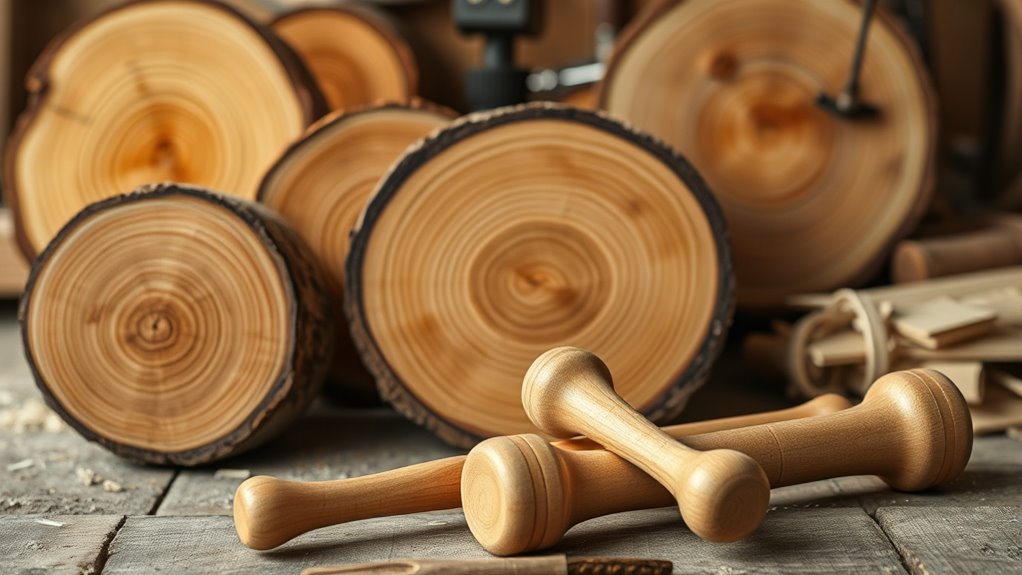

To carve wooden mallets from split rounds, start by selecting strong, straight-grain wood with the right moisture level to prevent warping. Use sharp tools to split and shape the head, following your design plan carefully. Shape and refine the head and handle, making sure they fit snugly. Finish with sanding and sealing for durability. If you want detailed steps and tips, keep exploring to craft a reliable, custom mallet.
Key Takeaways
- Select straight-grain, dense hardwood logs with appropriate moisture content for carving durable mallets.
- Use a sharp axe or maul to split logs cleanly along the grain, ensuring stable pieces for shaping.
- Mark the mallet head and handle design accurately with measuring tools and clear guidelines before carving.
- Shape the mallet head carefully, following grain orientation and using files and carving tools for smooth contours.
- Attach the handle securely with glue and wedges, then finish with sanding and protective coatings for durability.
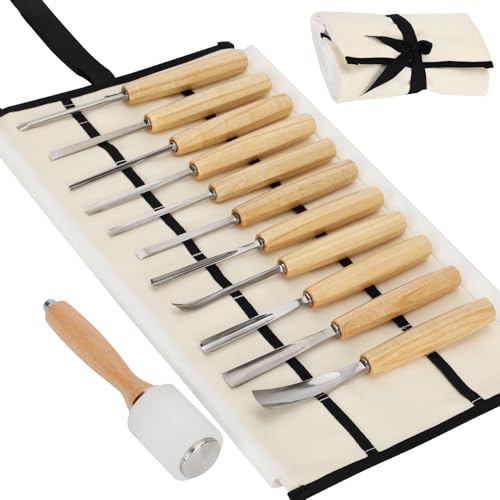
Wood Carving Kit – 12 PCS Professional Wood Carving Tools Set with Mallet & Canvas Case, Pre-Sharpened CR-V 60 Steel Gouges and Chisels for Whittling, Spoon Carving, Beginners & Professionals
- Pre-Sharpened and Ready to Use: Sharp, polished tools for immediate carving
- High-Quality CR-V 60 Steel: Durable, long-lasting sharpness and wear resistance
- Ergonomic Ash Wood Handles: Comfortable, non-slip grip for precise control
As an affiliate, we earn on qualifying purchases.
As an affiliate, we earn on qualifying purchases.
Selecting the Perfect Wood for Your Mallet

Choosing the right wood is essential for crafting a durable and effective wooden mallet. You want a wood with a tight, straight grain because it provides strength and stability, reducing the risk of cracks or splits during use. The wood grain also influences the mallet’s overall feel and performance, so select a piece with consistent grain orientation. Mallet weight is another critical factor; heavier woods deliver more impact, making your tool more effective for heavy-duty tasks. However, if the wood is too heavy, handling becomes tiresome. Balance is key—pick a wood that offers the right weight for your comfort while still providing durability. By choosing quality wood with the ideal grain and weight, you’ll craft a mallet that lasts and performs well. Additionally, selecting a wood with suitable shock absorption qualities can help prevent user fatigue and enhance safety during use. Considering the grain structure can also influence the mallet’s resilience and longevity over time. Incorporating wood with good resilience may also help your mallet withstand repeated impacts without degrading quickly. Moreover, selecting wood with optimal moisture content helps prevent warping or cracking as the mallet ages. Choosing properly dried wood reduces the risk of cracking and ensures a longer-lasting tool.
Splitting the Wood Into Manageable Rounds

Splitting your wood into manageable rounds is a crucial step that sets the foundation for a smooth carving process. You need to pay attention to the grain orientation, as splitting along the grain produces cleaner, more consistent rounds. Check the moisture content; wood that’s too wet or too dry can crack unpredictably. Aim for wood with balanced moisture, usually around 12-15%, to ensure it splits evenly without splintering. Use a sharp axe or splitting maul and strike confidently along the grain, avoiding cross-grain splits. Keep your logs stable on a solid surface, and work carefully to create rounds that are easy to handle. Properly split rounds will make your carving more precise and reduce the risk of damaging your tools or ruining your work. Additionally, consider the water content of your wood, as properly hydrated wood splits more cleanly and reduces the risk of cracking. Ensuring your wood is at the optimal moisture level can significantly improve the splitting process and the quality of your finished mallets. Being aware of grain orientation helps prevent dangerous kickbacks and ensures cleaner splits. Moreover, understanding how wood properties influence splitting can help you select the best logs for your project. Knowing about wood density can also assist in choosing the right logs for carving, as denser woods tend to split less easily but produce durable mallets.
Planning and Marking Your Mallet Design

Start by choosing the shape that best fits your needs and style. Use measurements to guarantee your design is accurate and balanced. Then, mark your guidelines clearly to guide your carving process effectively. Incorporate hashtags into your planning to increase the visibility of your project and connect with a larger woodworking community. To ensure your project’s success, consider the power output of your tools and materials to match your desired results. Understanding appliance testing and compatibility can also help prevent issues with your tools and ensure safety during your woodworking process. Additionally, paying attention to costume details can help you create more authentic and visually appealing carvings for your project.
Selecting the Right Shape
Before you begin shaping your mallet, it’s vital to decide on the right overall form that suits your intended use. Consider ergonomic design to guarantee comfort during use, reducing fatigue. Aesthetic considerations matter too, as a well-shaped mallet looks appealing and feels balanced. To choose the right shape, keep these points in mind:
- Match the size to your hand for better control.
- Confirm the head has enough mass for effective impact.
- Opt for a shape that fits comfortably in your grip.
- balance aesthetic appeal with functional ergonomics.
- Incorporate tuning principles to ensure the mallet performs well during use.
Measuring for Accuracy
Accurate measuring and careful marking set the foundation for a well-crafted mallet. To guarantee measuring accuracy, use reliable measurement tools like a ruler, calipers, or a square. Take your time to double-check each measurement before marking. Precision in measuring helps you maintain the proper proportions and symmetry of your mallet, which affects both appearance and function. When marking, use a fine pencil or marking knife for clarity and accuracy. Keep your tools steady and consistent, avoiding rushed or imprecise marks. Remember, small errors at this stage can lead to misaligned parts or uneven surfaces later. By prioritizing accurate measurement and careful marking, you set yourself up for a smoother carving process and a professional-looking finished mallet. Paying attention to lifestyle factors such as workspace organization and lighting conditions can also enhance your focus and accuracy during this stage. Incorporating digital measurement tools can further improve precision and save time during your project. Additionally, understanding automation in business demonstrates how technological advancements can streamline processes, much like how precise measurements streamline your crafting workflow.
Marking Guidelines Clearly
Clearly marking your mallet design guarantees your carving proceeds smoothly and results in a professional-looking piece. Pay attention to the wood grain, as it influences how your design will flow naturally. Use a pencil or fine-point marker to outline your pattern, ensuring clarity and precision. Here are key tips to follow:
- Align your design with the wood grain to highlight natural mallet symbolism.
- Mark the center and key features before cutting or carving.
- Keep guidelines visible but light enough to erase or carve away.
- Double-check measurements and design placement to avoid mistakes.
Properly marking your mallet ensures the grain complements your design, enhancing both aesthetic appeal and symbolism. Clear guidelines help you carve with confidence, respecting the wood’s natural beauty.
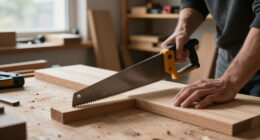
Shaping the Mallet Head With Hand Tools

Start shaping the mallet head by chiseling away the rough surface to define its form. Use files to smooth out any uneven spots and refine the shape. This combination of tools will help you achieve a clean, well-balanced head. Incorporating goal setting into your project can help you stay focused and motivated throughout the process. Additionally, paying attention to oral health maintenance can guide you in selecting tools that promote safety and precision during shaping.
Chiseling the Surface
Once you’ve marked the desired shape on the mallet head, you can begin chiseling the surface to refine its form. Focus on following the grain orientation to prevent splits and achieve a smooth surface texture. Use your chisel carefully, making controlled cuts that remove small shavings. To assure even shaping:
- Work with the grain, not against it, for cleaner cuts
- Keep your chisel sharp for precise control
- Remove high spots gradually, checking your progress frequently
- Maintain consistent angles to shape the surface uniformly
Pay attention to the grain direction to avoid chipping and to develop a consistent surface texture. Patience and precision are key to achieving a smooth, well-shaped mallet head that’s ready for finishing.
Smoothing With Files
To smooth the mallet head, grab a file suited for shaping wood, such as a flat or half-round file. Choose file types that match the contours you want to refine, paying attention to the wood grain to prevent tearing. Use light, even strokes along the grain, moving gradually to avoid gouging the surface. Different file types, like mill or rasp files, help remove rough spots and shape curves smoothly. Work carefully around edges, maintaining symmetry, and frequently check your progress. Keep the file clean to prevent debris from scratching the wood. As you progress, switch to finer files to achieve a polished finish. Proper filing enhances the shape and prepares the surface for final sanding, ensuring a well-crafted and durable mallet head.
Crafting a Comfortable and Durable Handle

Creating a handle that’s both comfortable to hold and durable requires careful selection and shaping of the wood. Focus on handle materials that provide strength and a good grip. An ergonomic grip reduces hand fatigue and increases control during use. To achieve this:
- Choose dense, hardwoods like hickory or oak for durability.
- Shape the handle with a slight taper for comfort.
- Smooth the surface to prevent splinters and improve grip.
- Carve gentle contours where your hand naturally rests.
Use your tools to create a handle that feels secure yet comfortable. Keep the handle’s surface free of rough edges, ensuring it’s safe for prolonged use. A well-crafted handle improves both safety and efficiency when using your wooden mallet.
Assembling and Securing the Mallet Components

Before you start securing the mallet components, gather all the necessary tools and materials, including glue, wedges, and clamps. Choose an appropriate adhesive option—wood glue works well for most projects, providing strong bonds without excess mess. Apply the glue evenly to the handle and mallet head’s contact surfaces. Fit the handle into the head, ensuring it’s snug. To prevent movement during drying, use clamps to hold everything firmly in place. For added security, consider hardware installation, such as inserting wedges or dowels into the top of the handle. These wedges expand within the mallet head, locking the handle securely. Allow the glue to cure fully before handling further, ensuring a solid, durable connection. Proper assembly guarantees your mallet will withstand regular use.
Finishing Touches: Sanding, Smoothing, and Sealing

After assembling your mallet, the next step is to refine its surface for a smooth, professional finish. Sanding is vital to reveal the wood grain and remove rough spots. Start with medium-grit sandpaper, then move to fine grit for a polished surface. When choosing finish types, consider options like oil, wax, or polyurethane, which protect and enhance the wood’s appearance. To guarantee quality, keep these points in mind:
- Sand with the grain to prevent scratches.
- Use progressively finer sandpapers for a smooth surface.
- Apply finishes evenly, following the wood grain.
- Seal the mallet thoroughly to protect against moisture and wear.
Finishing touches improve the look and durability of your mallet, making it ready for use.
Tips for Maintaining and Using Your Wooden Mallet

To keep your wooden mallet in top shape, proper maintenance is key. Always pay attention to grain orientation when carving; this ensures durability and reduces splitting. Store your mallet in a cool, dry place, away from direct sunlight or extreme humidity, to prevent warping. Proper storage tips include hanging it or placing it on a shelf with good airflow. Regularly inspect for cracks or splinters, and sand rough spots lightly to maintain a smooth strike. Applying a light coat of linseed oil every so often helps preserve the wood’s integrity. Use the following table to guide your care:
| Tip | Why it matters | Best practice |
|---|---|---|
| Grain orientation | Prevents splitting | Carve with the grain |
| Storage tips | Maintains shape and strength | Keep in a dry, ventilated spot |
| Regular inspection | Ensures safety and longevity | Check for cracks or splinters |
Frequently Asked Questions
What Safety Gear Should I Wear During Mallet Carving?
When you carve wooden mallets, safety should be your top priority. You should wear protective gloves to prevent cuts and splinters, especially when handling sharp tools. Eye protection is also essential to shield your eyes from flying wood chips and debris. Always work in a well-lit area and stay focused on your task. Proper safety gear helps you carve confidently while minimizing the risk of injury.
How Long Does It Typically Take to Complete a Wooden Mallet?
Think of carving a wooden mallet like baking bread; it takes patience and practice. Timing expectations vary based on your skill level, but generally, it takes several hours to a day to complete a mallet. If you’re a beginner, plan for more time, as mastering tools and techniques is essential. With experience, you’ll carve faster, but always prioritize safety and precision over speed.
Can I Customize the Shape of My Mallet Head?
You absolutely can customize the shape of your mallet head through mallet shape customization. When carving mallet heads, you have the flexibility to create various shapes to suit your needs, whether for woodworking or other crafts. Just plan your design carefully, use the right tools, and take your time. Carving mallet heads allows you to personalize your tools, making them more effective and comfortable for your specific projects.
What Types of Finishes Are Best for a Wooden Mallet?
When choosing finishes for your wooden mallet, you want options that boost durability and protect the wood. Polyurethane and tung oil are excellent, offering good resilience and easy application. To maximize durability, apply finishes with proper techniques: sand the surface smooth first, then use thin coats, allowing proper drying time. This ensures your finish adheres well, providing long-lasting protection and enhancing your mallet’s performance during use.
How Do I Prevent the Mallet From Splitting Over Time?
Did you know that properly preventing wood splitting can triple a wooden mallet’s lifespan? To boost your mallet’s durability, you should select dense, seasoned wood and avoid knots. Apply a finish that penetrates deeply, like oil or beeswax, to protect against moisture. Additionally, keep the mallet dry and store it properly. These steps actively prevent wood splitting, ensuring your tool remains strong and effective for years to come.
Conclusion
Now that you’ve carved your wooden mallet, it’s like holding a piece of craftsmanship in your hand. Regular maintenance keeps it sturdy and reliable, just like a trusted tool should be. With care and practice, your mallet will serve you well, whether for woodworking or other projects. Remember, each strike is a demonstration of your skill—like a musician hitting perfect notes. Keep honing your craft, and enjoy the satisfaction of creating something truly yours.