To build a simple firewood shed in a weekend, start by choosing a level, well-drained spot near your home. Gather basic materials like treated lumber, plywood, and roofing supplies. Construct a sturdy foundation with support posts, then assemble the frame, attach siding, and add a roof for protection. Incorporate ventilation to keep the wood dry, and finish with optional features like gutters. If you keep going, you’ll discover all the tips to make your shed last year-round.
Key Takeaways
- Choose a level, well-drained site close to your home or fire area for easy access and effective drying.
- Prepare a sturdy foundation with gravel or concrete, and set treated posts securely for stability.
- Build a simple frame with horizontal beams and support posts, ensuring everything is level and square.
- Install weather-resistant siding and roofing materials, sealing all seams to keep out moisture.
- Add ventilation features, organize storage, and perform regular maintenance for longevity and safety.

Mr IRONSTONE Firewood Rack Outdoor Indoor, Adjustable to ANY Length Firewood Log Rack Brackets Kit, Heavy Duty Fire Wood Storage Racks, Fireplace Wood Holder for Patio Deck
- Product Dimensions: 13×3.8×6 inches per bracket
- Material: 13 GA steel with powder coating
- Rust Resistant: Electrostatic black powder coating
As an affiliate, we earn on qualifying purchases.
As an affiliate, we earn on qualifying purchases.
Planning Your Firewood Shed Layout

Before building your firewood shed, you need to carefully plan its layout to make sure it’s functional and efficient. Start by determining the ideal size based on how much firewood you want to store. Consider placing the shed close to your home or stove for easy access, but make certain it’s also away from moisture-prone areas. Think about orientation: positioning the shed to maximize airflow will help your wood stay dry and seasoned. Include space for stacking firewood in an organized manner to prevent pests and rot. Incorporate gaps or vents for ventilation, and plan for a sturdy, level foundation. A well-thought-out layout will save you time during construction and keep your firewood dry and ready whenever you need it. Understanding size restrictions for tiny houses and zoning laws can also inform your shed’s design, ensuring it complies with local regulations. Additionally, considering proper ventilation techniques will enhance your shed’s ability to keep firewood dry and prevent mold growth. Incorporating airflow management strategies is crucial for maintaining optimal drying conditions. Moreover, selecting durable materials like modern weather-resistant fixtures can extend the lifespan of your shed and improve its overall functionality. Using vetted construction methods will also help ensure your shed remains sturdy and weatherproof over time.
Gathering Necessary Materials and Tools

Before you start building, you need to gather all the necessary materials and tools. Make sure you have an essential materials checklist, including lumber, nails, and weatherproofing supplies, along with the required hand tools like a saw, hammer, and measuring tape. You might also want to collect optional construction supplies, such as brackets or paint, to enhance your shed’s durability and appearance. Incorporating sound healing science principles into your planning can help you create a calming and harmonious workspace for your project. Paying attention to nutrient-rich materials can also contribute to more resilient and sustainable construction. Additionally, choosing electric-powered tools can improve efficiency and reduce manual effort during construction. Selecting regionally sourced materials supports local economies and reduces environmental impact.
Essential Materials Checklist
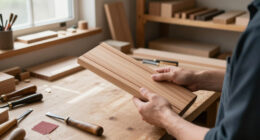
To build a sturdy firewood shed, you’ll need to gather all essential materials and tools ahead of time. Start with lumber for the frame, floor, and roof—pressure-treated wood is ideal for durability. You’ll also need plywood or siding panels for walls, plus screws and nails for assembly. Don’t forget concrete or gravel if you plan a foundation, guaranteeing stability. Hinges and latches are necessary for the door. For roofing, consider asphalt shingles or metal panels, along with roofing nails or screws. Gather a level, measuring tape, and a square to ensure accurate construction. Having these materials ready before you start will make the building process smoother and faster, helping you complete your firewood shed efficiently over the weekend. Additionally, understanding auditory processing techniques can be beneficial if you plan to incorporate sound-based elements or need to address hearing sensitivities during construction. Proper planning and indoor gardening knowledge can also aid in optimizing your workspace for better project management. Planning your project with a focus on material durability ensures your shed withstands weather and time effectively. Moreover, considering creative problem-solving can help you overcome unexpected challenges during construction, making the process more enjoyable. Remember to consider bicycle tire longevity in storage to protect your tools and materials from damage during long-term storage.
Required Hand Tools
Gathering the right hand tools is essential to make certain your firewood shed construction goes smoothly. You’ll need a hammer for framing and nailing, and a tape measure to ensure accurate measurements. A level helps keep your shed square and stable, while a square ensures right angles during framing. A handsaw or circular saw is necessary for cutting lumber to size, and a drill makes assembly faster with screws. You might also want a wrench or pliers for tightening bolts or adjusting hardware. Safety gear like gloves and safety glasses protect you during the process. Having these tools ready before starting prevents delays and guarantees your project stays on track. Additionally, understanding digital literacy can be beneficial for managing project plans and researching techniques online. Developing basic digital skills can help you access tutorials and resources more efficiently. Learning about safety procedures ensures you work safely and reduces the risk of injury during construction. Recognizing the importance of emotional alignment can help maintain focus and motivation throughout the project. With the right hand tools, you’ll build a sturdy, functional firewood shed efficiently.
Optional Construction Supplies
Once you start collecting construction supplies, you’ll want to make certain you have all the necessary materials on hand to avoid interruptions. Optional supplies can include things like treated lumber for added durability, metal brackets for extra support, or weather-resistant screws and nails. Consider gathering gravel or crushed stone for a stable foundation and roofing materials like shingles or metal sheets if you want extra protection from the elements. If you plan to paint or stain the shed, pick up those supplies as well. Additionally, having safety gear such as gloves, goggles, and ear protection is helpful. While these supplies aren’t essential, they can make your build more durable, long-lasting, and easier to complete. Preparing these extras ensures a smoother, more efficient construction process.
Choosing the Best Location for Your Shed

When selecting a location for your firewood shed, consider how easy it is to access and whether it’s convenient to reach your firewood. Make sure the spot is level with proper drainage to keep your wood dry and prevent rotting. Also, choose a safe area close to resources but away from hazards like falling branches or high-traffic zones.
Accessibility and Convenience
Choosing the right location for your firewood shed is essential for easy access and efficient use. Place it near your home or driveway to minimize carrying distance, especially during harsh weather. Ensure the path to the shed remains clear and straightforward, avoiding obstacles like trees or uneven terrain. Position it where you can quickly grab firewood without disrupting other outdoor activities. Consider proximity to your fire pit or stove so you can easily fetch wood when needed. Also, think about access for your wheelbarrow or cart—wide enough paths make moving wood simple. A convenient location saves you time and effort, keeping your firewood organized and accessible year-round. Prioritize a spot that balances accessibility with practicality for regular use.
Level and Drainage
Have you considered how the levelness and drainage of your firewood shed site affect its longevity and functionality? A level surface prevents the shed from tipping or shifting over time, ensuring stability and ease of access. Choose a spot with slight natural slope away from your home to promote good drainage; this keeps rainwater from pooling around the foundation. Avoid low-lying areas prone to flooding or standing water, which can cause wood rot and structural damage. Clear the ground of roots, rocks, and uneven patches before building. If necessary, level the ground using gravel or a simple frame and fill. Proper drainage not only prolongs the life of your shed but also keeps your firewood dry and ready to burn.
Nearby Resources and Safety
Selecting the right location for your firewood shed involves considering nearby resources and safety. You want easy access to your woodpile without creating hazards or inconvenience. Choose a spot close enough to your home for convenience but far enough to prevent pests from entering. Keep the shed away from your house to reduce fire risk and avoid blocking pathways. Additionally, consider natural features that can provide shelter or drainage. Think about these factors:
- Proximity to your home for easy access
- Distance from trees or overhanging branches to prevent fire hazards
- Good drainage to prevent wood from rotting or mold
- Accessibility for transportation and delivery of logs
Prioritize safety and convenience to make your firewood management efficient and safe.
Building the Foundation and Support Posts

To guarantee your firewood shed stands sturdy and lasts for years, start by laying a solid foundation and installing support posts. Begin by choosing a level, stable spot and marking the layout. Dig holes for the foundation using a post-hole digger, making them about 12 inches wide and 24 inches deep. Fill each hole with gravel for drainage, then set your support posts—usually treated lumber—into the holes. Use a level to ensure they stand straight and plumb. Fill the gaps with concrete or dirt, then allow it to cure if you’re using concrete. These support posts will hold up your shed’s frame, providing stability and strength. Taking your time here prevents future issues with sagging or shifting.
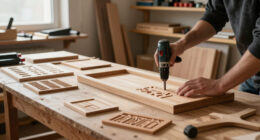
Assembling the Frame Structure

Once your support posts are securely in place, you can begin assembling the frame structure of your firewood shed. Start by attaching horizontal beams across the tops of the support posts, ensuring they are level. Use brackets or screws to secure each connection firmly. Next, add vertical supports along the sides to create the shed’s perimeter, then connect these with additional horizontal beams to form the roof frame. Keep these steps organized to maintain proper alignment.
Here’s what to focus on:
- Ensuring all beams are level and square
- Using the correct hardware for secure joints
- Double-checking measurements before fastening
- Leaving space for future roof installation
This framework provides stability and shape for your shed, setting the stage for weatherproofing.
Installing the Roof for Weather Protection

With the frame structure in place, it’s time to focus on installing the roof to protect your firewood from the elements. First, measure and cut your roofing material, such as plywood or corrugated metal, to fit the frame. Secure the sheets to the top beams using appropriate fasteners, ensuring they overhang slightly on all sides for runoff. If you’re using shingles, start from the bottom edge and work upward, overlapping each row to prevent leaks. Make sure to install roofing underlayment or waterproof barrier before attaching the final surface, especially if using shingles. Check that the roof has a slight slope to facilitate water drainage. Once secured, inspect for any gaps or loose fasteners, and make adjustments to ensure your firewood stays dry and protected.
Adding Siding and Wall Panels

Adding siding and wall panels is the next step to complete your firewood shed’s enclosure. This protects your wood from the elements and gives your shed a finished look. Start by measuring and cutting your siding material to fit each wall. Use exterior-grade panels like plywood, OSB, or weather-resistant siding. Attach the panels securely to the wall frame with nails or screws, ensuring they’re flush and level. Consider sealing seams and edges with weatherproof caulk to prevent leaks. For added durability, paint or stain the panels for extra weather resistance. Keep these points in mind:
- Measure carefully before cutting
- Use appropriate fasteners
- Seal seams to prevent moisture intrusion
- Choose weather-resistant materials
This step guarantees your shed stays dry and sturdy for years to come.
Creating Ventilation for Dry Firewood

Creating proper ventilation is essential to keep your firewood dry and prevent mold or rot. Good airflow allows moisture to escape, ensuring your wood stays dry and ready to burn. To achieve this, leave small gaps between wall panels or siding, and install vents near the top and bottom of the shed. Think of your shed as a simple system where air moves freely through open spaces.
Here’s an image of airflow:
| Air enters through | Moves across the wood | Exits through |
|---|---|---|
| Vent openings at bottom | Circulates around logs | Vents at top |
| Small gaps in siding | Keeps moisture out | Promotes drying |
Finishing Touches and Optional Features

Once you’ve built the main structure of your firewood shed, it’s time to contemplate finishing touches and optional features that can enhance its functionality and durability. Adding these details guarantees your shed lasts longer and works better. Consider installing a sloped roof for rain runoff, or adding a weatherproof sealant to safeguard wood from moisture. You might also include a simple door latch for security or a small shelf for kindling and tools. To improve airflow, install adjustable vents or louvers. Additionally, attaching a gutter system can direct rainwater away from your shed’s foundation. These small upgrades make your shed more efficient, protect your firewood, and give it a polished, professional look. Focus on features that suit your needs and climate for the best results.
Tips for Maintaining Your Firewood Shed

To keep your firewood shed in top condition, regular maintenance is essential. Start by inspecting for any signs of damage, such as loose boards or leaks, and fix them promptly. Keep the shed clean by removing debris, leaves, and dirt that can cause moisture buildup. Guarantee proper airflow by checking vents or openings, which helps prevent mold and rot. Treat the wood with a weatherproof sealant annually to protect against moisture and pests. Also, lift stored firewood periodically to check for pests or decay underneath. Clear any overhanging branches that could drop debris or cause damage during storms. Regular upkeep not only prolongs the life of your shed but also keeps your firewood dry, seasoned, and ready for use whenever you need it.
Frequently Asked Questions
How Much Does a Firewood Shed Typically Cost to Build?
A firewood shed’s cost varies depending on size, materials, and design. Generally, you might spend between $200 and $1,000. If you use basic lumber and simple construction, costs stay lower. Upgrading to treated wood or adding features like a roof or storage compartments increases expenses. You can cut costs by repurposing materials or doing the work yourself. Planning ahead helps keep your project budget-friendly.
Can I Build a Firewood Shed Without Prior Woodworking Experience?
You might think building a firewood shed without experience is impossible, but it’s more doable than you imagine. With clear instructions and basic tools, you can tackle simple designs and learn as you go. Focus on straightforward plans, gather the right materials, and take your time. You’ll find that, in reality, creating a functional shed with no prior skills is like turning a rookie into a pro overnight.
How Long Does It Usually Take to Complete a Simple Firewood Shed?
It usually takes about a weekend to build a simple firewood shed, especially if you’re handy and have basic tools. You’ll spend time planning, gathering materials, and assembling the structure. If you’re new to woodworking, it might take longer, but with clear instructions and help, you can still finish it in a couple of days. Keep your project simple, stay organized, and you’ll have your shed ready quickly.
Are There Any Specific Safety Precautions to Consider During Construction?
When you’re constructing a firewood shed, safety should be your top priority. Always wear protective gear such as gloves, goggles, and sturdy boots to prevent injuries. Use tools carefully, and guarantee they are in good condition. Be cautious of sharp nails and splinters, and work on a stable surface. Keep your work area clear of clutter, and don’t rush—taking your time helps prevent accidents.
What Are Some Eco-Friendly Materials I Can Use for My Shed?
When choosing eco-friendly materials for your shed, you want options that are sustainable and low-impact. Consider reclaimed wood or recycled metal to reduce waste. Bamboo is another great choice because it’s fast-growing and durable. You might also look into using organic or non-toxic paints and sealants to minimize environmental harm. These materials help you build responsibly while creating a sturdy, eco-conscious shed that’s good for the planet.
Conclusion
In just a weekend, you’ve built a firewood shed so sturdy, it could withstand a hurricane and shelter a forest. Your firewood will stay perfectly dry, ready to ignite even the coldest nights. With this shed, you’re now the ultimate firewood master—fending off dampness and chaos with a structure so tough, it might as well be a fortress. Now, sit back, relax, and enjoy the warm glow of your perfectly stored firewood oasis!