
To properly break in your new splitter, follow the manufacturer’s instructions carefully. Start with short, varied runs and avoid pushing the machine to maximum capacity at first. Use recommended oils, monitor for unusual noises or leaks, and give the splitter regular breaks to cool down. Gradually increase workload as the parts settle. Keeping everything well-lubricated and avoiding overworking it helps guarantee long-lasting performance—if you want to get the most from your splitter, keep going for more tips.
Key Takeaways
- Follow the manufacturer’s break-in schedule and use recommended oil types for initial operation.
- Operate the splitter at partial loads with varied functions to avoid overstressing components.
- Monitor for unusual noises, leaks, and heat buildup during the first uses, inspecting regularly.
- Allow the machine to cool down and rest between sessions to prevent overheating and ensure longevity.
- Gradually increase workload as the splitter proves reliable, avoiding maximum capacity during initial break-in.

Are you wondering how to properly break in your new splitter to guarantee peak performance and longevity? The initial break-in process is essential for ensuring your machine operates smoothly and maintains its splitter durability over time. Proper break-in techniques help reduce unnecessary wear on components, preventing early failures and extending the life of your equipment. So, it’s worth investing a little time upfront to get it right.
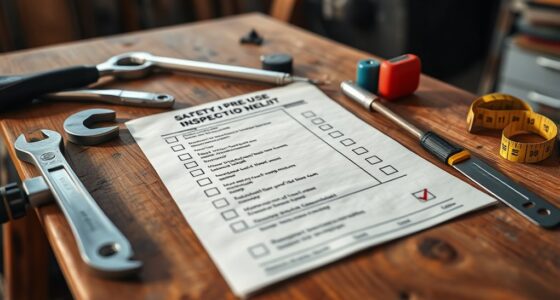
Start by reading the manufacturer’s instructions carefully. They often provide specific guidelines tailored to your model, which can include recommended break-in schedules, oil types, and operational limits. Generally, you want to begin with lighter loads and avoid pushing the splitter to its maximum capacity right away. This gradual approach allows the internal parts, such as the hydraulic system and engine, to settle into their best working conditions. It’s similar to warming up your muscles before a workout—slow and steady movements help prevent strain and damage.
Always follow the manufacturer’s instructions for optimal break-in and performance.
When you first operate the splitter, use it for short periods, focusing on different functions to ensure all components are working harmoniously. During these initial runs, pay close attention to how the machine responds. Listen for unusual noises or vibrations, which can indicate that something isn’t quite right. Regularly check for leaks, loose fittings, or abnormal heat buildup, especially in the hydraulic system. These early inspections help catch issues before they escalate, safeguarding your splitter’s long-term durability.
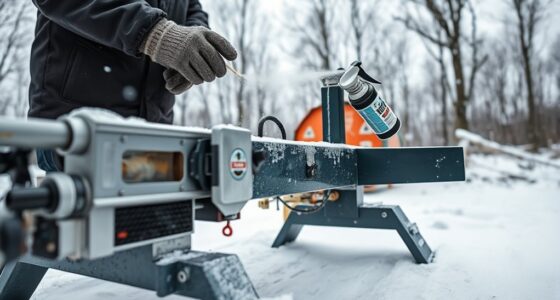
Another essential aspect of break-in techniques involves proper lubrication. Use the recommended oil, and change it as prescribed in the manual. During the initial phase, keeping all moving parts well-lubricated minimizes friction and wear, which ultimately enhances splitter durability. Avoid overworking the machine during the break-in period—pushing it too hard can cause undue stress on the engine and hydraulic components, leading to early breakdowns. Additionally, using quality oils can help improve the overall performance and lifespan of your machine. Instead, operate it at moderate speeds and workloads, gradually increasing as the machine proves its reliability.
Finally, give your splitter time to rest between uses during this initial period. Allow it to cool down after each session, especially if you notice any heat buildup. This prevents overheating and helps maintain best performance over time. Properly performed break-in techniques not only improve the immediate functionality of your machine but also help it develop a longer-lasting, more resilient structure. Taking these steps now will pay off in the form of increased splitter durability, fewer repairs, and a more reliable machine that serves you well for years to come.
Frequently Asked Questions
How Long Should the Break-In Period Last?
The break-in duration for your new splitter typically lasts around 8 to 12 hours of operation. During this period, you’ll notice improvements in splitter performance as the components settle and wear-in. It’s important to avoid pushing the machine too hard early on, allowing the parts to adapt gradually. Following this recommended break-in duration helps guarantee peak efficiency, longevity, and smooth operation of your splitter in the long run.
What Signs Indicate a Splitter Is Breaking in Properly?
You’ll notice proper break-in symptoms, like smoother operation and consistent performance, indicating your splitter is breaking in well. Look for reduced noise, less vibration, and improved handling, which contribute to longer splitter longevity. If these signs appear within the expected timeframe, your splitter is on the right track. Address any unusual sounds or jerky movements early, as they may signal issues that could affect its long-term performance.
Can I Accelerate the Break-In Process?
You can’t really accelerate the break-in process, and trying break-in shortcuts may damage your splitter. Imagine a new splitter like a new engine; rushing it could cause premature wear. Instead, follow proper break-in procedures diligently. An accelerated break-in might seem tempting, but it risks compromising durability and performance. Trust the process, monitor signs of proper break-in, and avoid shortcuts to ensure your splitter runs smoothly and lasts longer.
Are There Specific Lubricants Recommended During Break-In?
Yes, during the break-in duration, you should select a recommended lubricant suited for your splitter’s components. Use a high-quality, lightweight oil that minimizes friction and wear. Follow the manufacturer’s guidelines for lubricant selection to guarantee peak performance. Regularly check and reapply lubricant as needed, especially during the initial break-in period, to help your splitter operate smoothly and extend its lifespan.
What Maintenance Is Needed After the Break-In Period?
After the break-in period, you should regularly check and adjust the splitter calibration to guarantee consistent performance, like tuning a guitar for perfect sound. Additionally, ongoing user training helps you spot potential issues early and maintain safe operation. Keep the blades sharp, lubricate moving parts as recommended, and inspect for wear. Staying proactive prevents costly repairs and keeps your splitter running smoothly, just like maintaining a well-oiled machine.
Conclusion
Remember, following these break-in procedures helps guarantee your new splitter performs at its best and lasts longer. Some might think it’s unnecessary, but skipping this step can lead to damage or inefficient operation. By taking a few minutes to properly break in your splitter, you’ll save time and money in the long run. Don’t skip this vital step—your equipment and your work will thank you for it. Stay diligent, and enjoy smooth, reliable performance every time.