
To construct a timber sawhorse from logs, start by selecting straight, dry hardwood logs with consistent diameter and straight grain for strength. Use sharp tools to shape and smooth the components, then assemble the legs, crossbeam, and supports tightly with strong fasteners like bolts or nails. Reinforce joints with glue or metal fasteners for extra durability and apply a protective sealant. To guarantee safety and longevity, regularly inspect and maintain your sawhorse as you continue your project.
Key Takeaways
- Select straight, seasoned hardwood logs with consistent diameter and straight grain for strength and stability.
- Use sharp hand tools to accurately mark, cut, and shape logs, ensuring smooth surfaces and proper fit.
- Assemble the sawhorse with secure joints, reinforcing with metal fasteners and wood glue for durability.
- Attach the crossbeam securely, ensuring proper levelness and tight fastening to distribute weight evenly.
- Apply protective sealant and perform regular maintenance to enhance longevity and safety during use.

Oregon Steel Log Saw Horse, Foldable & Adjustable Sawbuck, 10 Inch Log Capacity, Folding Wood Cutting Stand, for Logging, Splitting & Firewood (584145)
- Sturdy, lightweight steel construction: Portable for easy transport
- Foldable design with serrated teeth: Ensures stable wood clamping
- Adjustable height and width: Up to 10.6-inch log capacity
As an affiliate, we earn on qualifying purchases.
As an affiliate, we earn on qualifying purchases.
Selecting Suitable Logs for the Sawhorse Frame
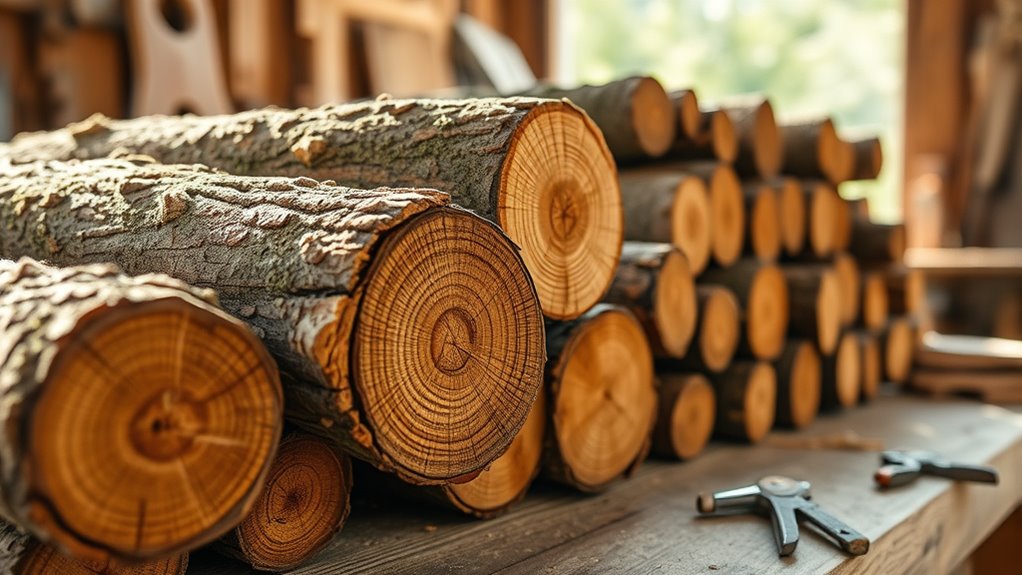
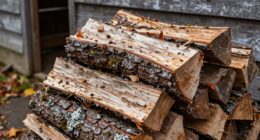
Choosing the right logs is essential to building a sturdy and durable sawhorse. When selecting logs, pay close attention to the wood grain; tight, straight grain offers strength and stability, making your sawhorse more reliable. Avoid logs with knots, cracks, or irregular grain patterns, as these weaken the structure. Log diameter also matters—aim for a consistent size that provides enough heft to support heavy loads without being too bulky to handle. Typically, logs with a diameter between 4 to 6 inches work well for the main frame. Ensuring uniformity in diameter helps make the sawhorse stable and balanced. Additionally, selecting logs from sustainably harvested sources can help mitigate environmental impacts associated with deforestation and promote responsible use of resources. By carefully choosing logs with the right wood grain and diameter, you set a solid foundation for a safe, long-lasting project.
Preparing and Shaping the Log Components

Now that you’ve chosen the right logs, it’s time to prepare and shape them. Using hand tools, you can smooth the surfaces and carve out the necessary dimensions. Proper shaping guarantees your sawhorse will be sturdy and safe to use. Additionally, paying attention to vibrational energy during your work can enhance your focus and overall craftsmanship. Considering projector technology principles, ensuring the logs are accurately shaped will contribute to a more stable and reliable structure. Being aware of Gold IRA tax implications can help you understand the importance of precise measurements and proper materials in your project. Paying attention to comfort solutions for sofa beds during your shaping process can help you select the right materials that maintain durability and comfort in your finished sawhorse. Knowing store hours can also assist in planning your work schedule to avoid store closures during your project.
Selecting Suitable Logs
To guarantee your sawhorse is sturdy and durable, selecting the right logs is essential. Focus on log selection by choosing logs with straight, tight wood grain, which provides strength and stability. Avoid logs with cracks, knots, or irregularities that could weaken the structure. Look for logs with consistent diameter and minimal tapering to ensure even support. Check the moisture content; logs should be seasoned or dry to prevent warping over time. Consider the type of wood, opting for hardwoods like oak or maple for added durability. When selecting logs, handle them carefully to assess their weight and overall integrity. Proper log selection establishes a solid foundation for building a lasting, reliable sawhorse. Additionally, inspecting logs for vetted quality ensures you choose materials that meet safety and durability standards.
Shaping With Hand Tools
Before you begin shaping your logs, it’s important to prepare them properly by selecting the right hand tools and understanding their functions. Use saws with sharp blades to ensure clean cuts, but always prioritize saw blade safety to prevent accidents. When working with hand tools like chisels and planes, focus on hand tool ergonomics—maintaining proper grip and posture reduces fatigue and enhances control. Carefully mark your logs to guide your cuts, and take your time to shape each piece accurately. Keep your tools sharp and well-maintained for efficient work. Remember, the goal is smooth, precise surfaces that fit together well. Proper preparation and attention to safety and ergonomics make the shaping process safer and more effective. Additionally, understanding personal finance management concepts can help you budget for tools and materials more effectively during your project. Incorporating design principles can also improve the overall stability and aesthetics of your timber sawhorse. Recognizing spiritual insights can inspire greater patience and focus during your craftsmanship process. Being aware of automation in business can help you streamline your procurement and inventory tracking for your tools and supplies. Moreover, applying Mazda Tuning principles such as precision and attention to detail can enhance the craftsmanship quality of your project.
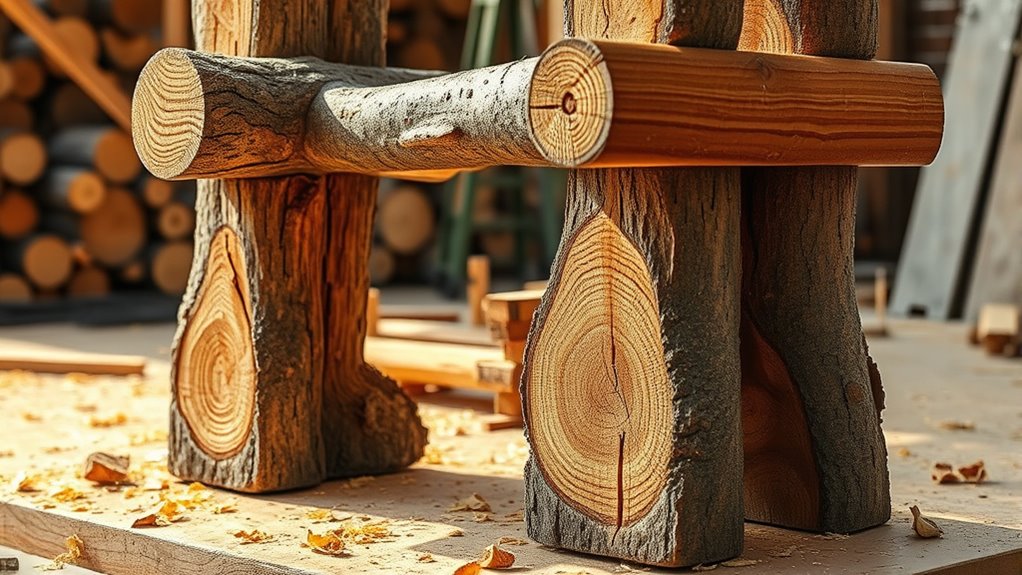
Assembling the Base and Legs for Stability

Assembling the base and legs is essential for guaranteeing your sawhorse remains stable during use. Start by selecting logs with straight grain, as this provides strength and reduces warping. When attaching the legs, pay attention to the wood grain orientation to maximize stability. Before joining, remove any knots, as these weaken the structure and may cause splitting over time. Use a chisel or saw to carefully eliminate knots that interfere with proper contact. Confirm the legs are evenly cut and securely fastened to the base, using strong joints or bolts. Proper alignment and secure fastening prevent wobbling. Additionally, understanding the importance of wood grain patterns can help you choose the most durable logs for your project. Recognizing digital literacy programs can also be beneficial if you seek guidance on safe and effective techniques. Being aware of AI training jobs can provide insights into opportunities for skill development in technology sectors. With careful attention to wood grain and knot removal, your assembled base and legs will support your work reliably and last through many projects. Being mindful of drivetrain components during assembly ensures your sawhorse maintains its stability even under demanding conditions. Furthermore, considering structural integrity principles will help you create a safer and more durable finished product.
Securing the Crossbeam for Support and Safety

Securing the crossbeam firmly to the legs is essential for adding support and ensuring safety during use. Proper crossbeam placement ensures stability and distributes weight evenly. When attaching, double-check that the crossbeam is level and flush with the top of the legs. Consider safety considerations like using strong fasteners such as carriage bolts or lag screws to prevent loosening. Additionally, ensure the joints are tight and secure to avoid wobbling or collapsing under load. Properly securing the crossbeam reduces risk of accidents and increases the sawhorse’s durability. Keep in mind that well-placed crossbeams also contribute to the overall strength of your structure, making it safer and more reliable during demanding tasks. Regular inspection of joints and fasteners is important to maintain wood stove safety standards and prevent structural failures. Regular maintenance and ensuring proper fastener compatibility further enhance the durability and safety of your sawhorse. Incorporating regional construction practices can also help adapt your build to specific environmental conditions, improving longevity. Moreover, understanding AI integration in construction tools can help streamline assembly processes and improve safety protocols. To further ensure safety, consider the emotional well-being of anyone using the sawhorse, especially in shared workspaces, by maintaining a secure and stable structure.
Finishing Touches and Reinforcements for Durability

To guarantee your sawhorse lasts, you should apply a protective sealant to shield it from moisture and wear. Reinforcing joints and fasteners adds extra strength, preventing loosening over time. These finishing touches will markedly boost your sawhorse’s durability and safety.
Applying Protective Sealant
Applying a protective sealant is a crucial step to guarantee your timber sawhorse withstands daily use and the elements. It helps protect the wood from moisture, decay, and pests, extending its lifespan. When choosing a sealant, consider a wood preservative that offers effective protection while minimizing environmental impact. A good sealant penetrates deeply, sealing pores and preventing water damage. Be sure to follow manufacturer instructions for application and drying times.
To deepen your understanding:
- Select eco-friendly sealants that reduce harmful chemicals
- Apply multiple thin coats for thorough coverage
- Ensure proper ventilation during application to minimize fumes
Reinforcing Joints and Fasteners
Have you considered how reinforcing your joints and fasteners can considerably boost your sawhorse’s durability? Using metal fasteners like bolts and nails alongside wood glue creates a stronger connection that withstands heavy use. Applying wood glue before fastening fills gaps and adds stability. To understand the importance, consider this table:
| Reinforcement Method | Benefit | Ideal Usage |
|---|---|---|
| Metal fasteners | Secure joints, prevent wobble | Heavy-duty or frequent use |
| Wood glue | Fills gaps, bonds wood | Lightweight, precision joints |
| Combined approach | Max strength, durability | Critical joints needing reinforcement |
| Proper installation | Prevents loosening | Ensures longevity |
| Regular checks | Maintains integrity | Sustains sawhorse over time |
Using both methods ensures your sawhorse remains sturdy and safe for years.
Tips for Maintenance and Long-Term Use

Regular maintenance is essential to guarantee your timber sawhorse remains durable and safe over time. Proper upkeep extends its lifespan and keeps it reliable for projects. To achieve this, consider applying finishing techniques like sealing or oiling the wood to protect against moisture and pests. Store your sawhorse using effective storage solutions, such as keeping it in a sheltered area or off the ground, to prevent rot and warping. Regularly inspect joints and fasteners, tightening or repairing as needed. Additionally, clean off debris or dirt after use to prevent buildup. By following these tips, you ensure your sawhorse stays sturdy and functional for years to come, making your woodworking projects safer and more efficient.
Frequently Asked Questions
What Safety Gear Should I Wear During Construction?
When you’re working on a project, safety gear is essential. You should always wear protective gloves to prevent splinters and cuts and safety goggles to shield your eyes from debris. These items help keep you safe from common hazards like flying wood chips or sharp edges. Always prioritize your safety by using the right gear, especially when handling logs and power tools, to guarantee a smooth and injury-free construction process.
How Do I Prevent the Logs From Cracking?
To prevent logs from cracking, you should focus on proper wood treatment and drying techniques. Start by selecting well-seasoned logs, ensuring they’re properly dried to reduce moisture content. Use slow, even drying methods like air drying or kiln drying, which minimize internal stresses. Applying wood preservatives or sealants can also help prevent cracks caused by environmental changes. Regularly inspect the logs for signs of cracking and address issues promptly to maintain their integrity.
Can I Customize the Sawhorse Size?
Yes, you can customize the sawhorse size to fit your needs. When customizing wood size, consider your preferred saw horse dimensions for stability and portability. Measure carefully and cut logs or lumber accordingly. Adjust the height, width, and length based on what you’ll be working on. Keep in mind that larger dimensions provide more support, but may be less portable. Proper planning guarantees your customized sawhorse is both functional and durable.
What Are Common Mistakes to Avoid?
Imagine sailing smoothly without hitting rough waters. When building, avoid common mistakes like neglecting joint stability, which can cause wobbling or collapse. Choose logs carefully, paying attention to grain and integrity, to guarantee a solid structure. Don’t rush your cuts, and measure twice to prevent uneven joints. By focusing on joint stability and log selection, you’ll create a sturdy, reliable sawhorse that stands the test of time.
How Do I Store the Finished Sawhorse?
You should store your finished sawhorse in a dry, covered area to prevent moisture damage. Use proper storage techniques like elevating it off the ground and keeping it away from direct sunlight. Before storage, consider wood treatment options such as applying a protective sealant or finish to prolong its lifespan. Regularly check for signs of rot or pest damage, ensuring your sawhorse stays in good condition for future use.
Conclusion
Just like the sturdy pillars of a temple, your timber sawhorse is built to stand the test of time. With careful selection, precise shaping, and solid assembly, you create a reliable workhorse for your projects. Remember, a well-made sawhorse is your faithful companion, much like a trusty sword in a hero’s hand — ready to support your craftsmanship and withstand the rigors of daily use. Keep it strong, and it’ll serve you well for years to come.