To make natural wood candle holders, start by selecting dried, high-quality hardwoods like maple or oak with tight, straight grain for stability. Sketch your design, then carefully cut and shape the wood, ensuring proper weight distribution and a stable base. Sand thoroughly for a smooth surface, and finish with a protective coat that highlights the wood’s natural beauty. Add personal details or accents to customize your piece. If you keep going, you’ll discover all the steps to create beautiful, safe candle holders.
Key Takeaways
- Select high-quality, dried hardwoods with tight grain for stability and safety.
- Sketch your design to plan shape, size, and decorative details before cutting.
- Properly sand wood surfaces along the grain for a smooth finish and better adhesion of finishes.
- Ensure a stable base and low center of gravity for safety and balance in your candle holder.
- Finish with protective coatings like clear varnish or wax to enhance durability and natural beauty.
Selecting the Perfect Wood for Candle Holders
Choosing the right wood is essential for creating durable and attractive candle holders. First, examine the wood grain; tight, straight grains tend to be more stable and less prone to cracking or warping. Avoid wood with irregular or loose grain patterns, as they can weaken over time. Moisture content also plays a critical role—aim for wood that’s properly dried, ideally between 6-8%, to prevent expansion, contraction, or splitting when exposed to heat or humidity. Fresh or green wood contains excess moisture, which can lead to problems during use. Additionally, selecting properly dried wood ensures you’re using high-quality materials that meet safety and durability standards. Using wood with the correct moisture content helps prevent warping or cracking over time. By selecting wood with a suitable grain and moisture content, you ensure your candle holders will be both beautiful and long-lasting, providing safety and style in your space.
Planning and Designing Your Candle Holders
Start by choosing the right wood type that matches your style and safety needs. Sketch out your design ideas to visualize the shape and size of your candle holders. Make sure to contemplate stability and safety to prevent accidents and ensure your candle holders are both beautiful and functional. Additionally, consider incorporating farmhouse-style elements during the planning process to better understand how your candle holders will complement your overall decor. To enhance the durability and longevity of your project, familiarize yourself with bicycle tire longevity in storage practices, which can inspire methods for safely treating and storing your wood materials. Understanding electric bike conversion kits can also offer insights into effective maintenance and storage techniques for various materials used in your crafts. Paying attention to rustic lighting options can further enhance the farmhouse aesthetic of your finished candle holders.
Selecting Suitable Wood Types
When selecting wood for your candle holders, it’s important to contemplate both aesthetics and safety. The wood grain influences the visual appeal, so choose a pattern that complements your design. Look for wood with a tight, consistent grain to guarantee stability and a smooth finish. Moisture content is vital; always opt for kiln-dried wood with low moisture levels to prevent cracking or warping over time. Avoid soft or porous woods that may burn or emit harmful fumes when exposed to heat. Hardwoods like maple, cherry, or oak are excellent choices because they’re durable and resistant to damage. Properly selecting your wood type ensures your candle holder is both beautiful and safe for everyday use. Additionally, selecting appropriate wood treatments can help enhance durability and safety.
Sketching Your Design Ideas
Before you begin carving or assembling your candle holder, it’s essential to plan and sketch your design ideas. Start by visualizing the overall shape and size, considering how it will fit into your space. Think about your chosen color palette—natural wood tones can be complemented with painted or stained decorative accents. Sketch multiple versions to explore different styles, from rustic to modern. Incorporate decorative accents like carved patterns, inlays, or painted details that enhance your design. These sketches serve as a blueprint, helping you refine proportions and details before starting the physical work. Clear sketches save you time and ensure your finished candle holder matches your vision while allowing room for creative adjustments along the way. Additionally, reviewing retail store hours can help you plan your shopping trips for supplies, ensuring you acquire everything needed without unnecessary delays. Considering design versatility can help you create a candle holder that complements various decor styles and occasions. Planning your project thoroughly also involves understanding different woodworking techniques to achieve the best results. Knowing about local resources and nearby suppliers can also streamline your material gathering process, saving you time and effort.
Considering Safety and Stability
Ensuring your candle holder is safe and stable is essential to prevent accidents and damage. Focus on proper weight distribution to keep it balanced, especially if using uneven or natural wood pieces. A stable base minimizes the risk of tipping over, reducing fire safety hazards. Consider the holder’s center of gravity and avoid overly tall or narrow designs that can easily wobble. Use a wide, flat bottom for added stability, and secure the candle snugly to prevent movement. Think about how the weight of the candle affects the overall balance. Proper design and weight distribution not only enhance safety but also guarantee your wood candle holder remains durable and functional over time. Additionally, choosing high-quality, natural wood materials can contribute to the overall stability and aesthetic appeal of your creation. Incorporating proper finishing techniques can also protect the wood and improve its durability, ensuring your candle holder stays sturdy. Applying organic techniques in the selection and treatment of your wood can also help maintain its integrity over time. Paying attention to fiber strength can further reinforce your design, making it more resistant to wear and accidental damage. Moreover, understanding spirituality and mindfulness can inspire more intentional and safe design choices that align with your personal growth. Proper design and weight distribution not only enhance safety but also guarantee your wood candle holder remains durable and functional over time. Prioritizing stability safeguards your space and creates a beautiful, secure centerpiece.
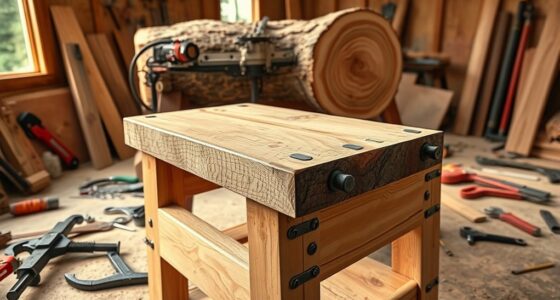
Cutting and Shaping the Wood Components

To shape your wood components accurately, start by selecting the right tools, such as a saw, chisel, or rasp, depending on the desired cut or curvature. Use a saw for straight cuts, ensuring precision for your candle holder’s base and supports. When creating curves or intricate details, employ carving and engraving techniques to add decorative touches. Mastering wood joint techniques, like dovetails or lap joints, helps ensure your pieces fit securely and look polished. Always measure carefully before cutting, and work slowly to maintain control. Rounding edges or shaping contours with a rasp can provide a smooth, natural feel. Additionally, understanding the importance of precise measurements can significantly improve the fit and overall appearance of your candle holder. Incorporating techniques from Mastering R Sounds in Speech Therapy can enhance your craftsmanship by improving your attention to detail. Paying close attention to sound vibrations can also inspire intricate design patterns based on natural rhythms. Taking your time during this stage results in a sturdy, aesthetically pleasing candle holder that showcases your craftsmanship.
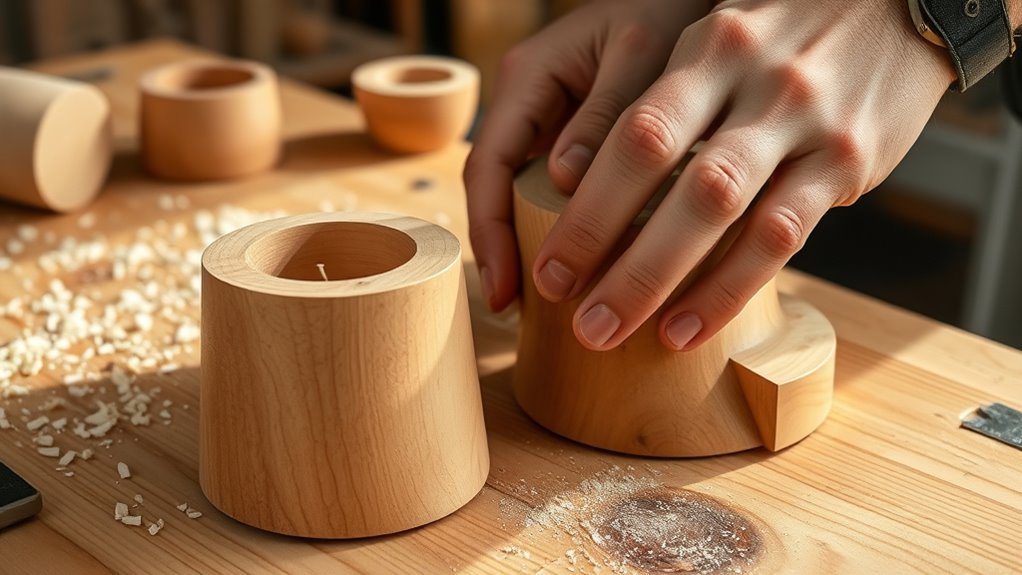
Sanding and Finishing for a Smooth Surface
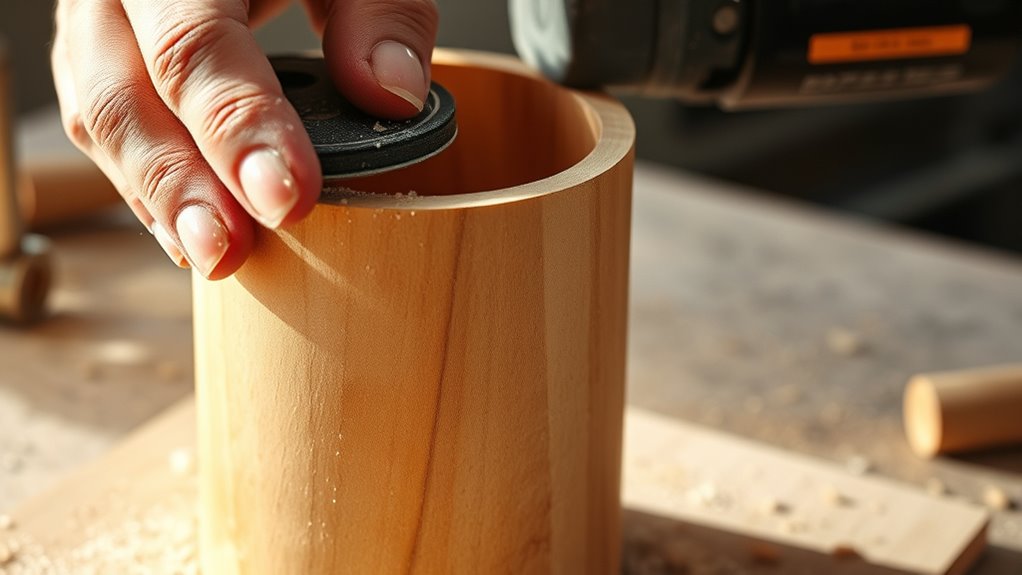
To achieve a sleek, professional look, you need to master sanding techniques that remove rough edges and imperfections. Choosing the right finish enhances the natural beauty of the wood while providing protection. Let’s explore how to smooth your candle holder and select a finish that highlights its best features.
Sanding Techniques for Smoothness
Achieving a smooth finish on your wood candle holder starts with proper sanding. Begin by following the grain direction with your sanding tools to prevent scratches and guarantee an even surface. Start with medium-grit sandpaper (around 120 grit) to remove rough spots and shape the wood. Then, switch to fine-grit sandpaper (220 grit or higher) for a smoother finish. Use sanding blocks or ergonomic tools to maintain consistent pressure and reach tight corners. Always sand along the grain to avoid creating uneven textures or scratches. Remember to regularly check your progress and wipe away dust to see the surface clearly. Proper technique ensures your candle holder will have a beautifully smooth, professional look.
Choosing the Right Finish
Choosing the right finish is essential for highlighting the natural beauty of your wood candle holder while providing durability and protection. You’ll want to think about various color options, from clear finishes that showcase the wood’s natural grain to tinted stains that add warmth or contrast. When applying your finish, make sure the surface is smooth and free of dust for a polished look. Remember, different finishes require different maintenance tips; for example, a simple wax may need periodic reapplication, while an oil finish offers ongoing nourishment. Select a finish that matches your desired aesthetic and suits how you plan to use the candle holder. Properly chosen and applied, your finish will enhance the wood’s appearance and ensure your creation lasts for years to come.
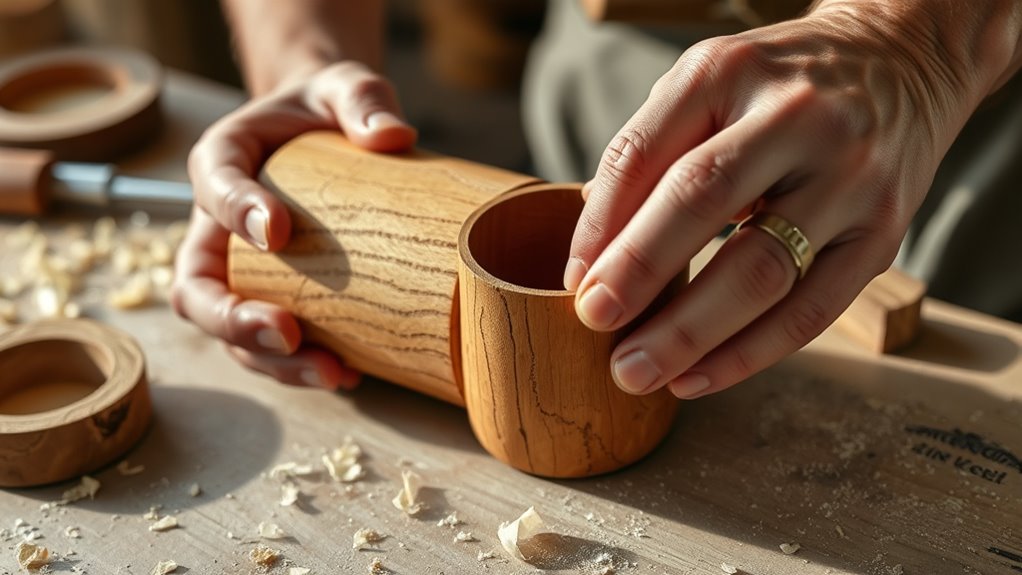
Drilling and Assembling the Candle Holders
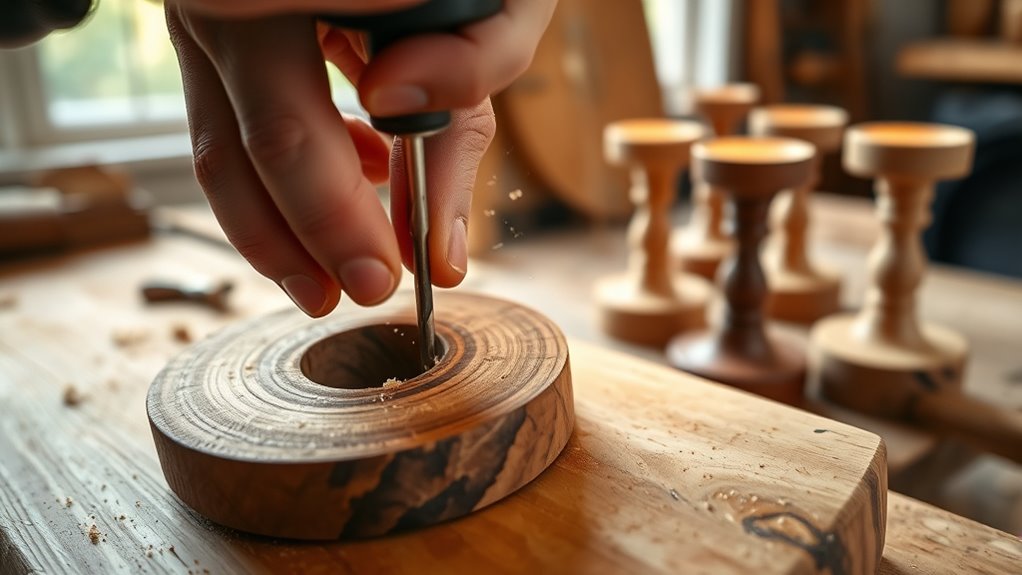
Before you start drilling, make sure your wood pieces are securely clamped to prevent slipping. Use proper drilling techniques, such as applying steady pressure and keeping the drill straight, to guarantee clean, accurate holes. Select the right drill bit size for your candle holders’ inserts or pegs. When drilling, go slowly to avoid splintering or damaging the wood. Once all holes are drilled, follow assembling tips like aligning pieces carefully and using wood glue or screws for stability. Take your time to fit everything snugly, and double-check the placement before final assembly. Proper drilling and careful assembly will result in a sturdy, professional-looking candle holder that highlights your craftsmanship and natural wood beauty.
Adding Personal Touches and Creative Details

Once you’ve assembled your candle holder, it’s time to add personal touches and creative details that make it uniquely yours. Explore personalization options like carving initials, adding painted designs, or staining the wood to match your decor. Decorative accents such as small natural elements—like pinecones, stones, or dried flowers—can enhance the rustic look. You might also consider attaching metal or leather details for a mixed-material effect. Use a clear finish or wood wax to protect your work and give it a polished appearance. These creative details reflect your style and make your candle holder truly special. Don’t be afraid to experiment with colors, textures, and embellishments to craft a piece that complements your space perfectly.
Frequently Asked Questions
How Do I Ensure the Candle Holder Is Heat-Resistant?
To guarantee your candle holder is heat-resistant, you need to focus on proper wood treatment. Use a heat-resistant finish or sealant designed for high temperatures, which helps protect the wood from heat damage. Applying multiple coats and allowing sufficient drying time enhances durability. Avoid untreated or cheap finishes, as they can crack or catch fire. Properly treated wood increases safety and longevity, making your candle holder both beautiful and functional.
Can I Use Reclaimed Wood for Candle Holders?
Did you know that using reclaimed wood reduces waste by up to 90%? Yes, you can definitely use reclaimed wood for candle holders. It offers unique, rustic charm and environmental benefits by repurposing materials instead of chopping new trees. Just guarantee the wood is properly dried and treated for safety. Reclaimed wood not only looks great but also helps you make eco-friendly choices, adding character and sustainability to your home decor.
What Safety Precautions Should I Take During Assembly?
When assembling your candle holders, prioritize safety by wearing appropriate safety gear like gloves and eye protection to prevent splinters or burns. Guarantee your workspace is well-prepared, clean, and well-ventilated to avoid accidents and inhaling fumes. Keep tools organized and handle sharp or hot equipment carefully. Taking these precautions helps you work safely and efficiently, reducing the risk of injury during your project.
How Do I Prevent Wood From Cracking Over Time?
Preventing wood from cracking over time begins with proper preparation. You should regularly treat your wood with appropriate wood treatment products to strengthen fibers and seal surfaces. Consistent conditioning keeps wood hydrated, preventing dryness that causes cracking. Additionally, avoid exposing your wood to extreme temperature shifts and direct sunlight. By combining careful care with effective cracking prevention techniques, you ensure your wood remains durable, beautiful, and crack-free for years to come.
What Type of Finish Is Safest for Candle Holders?
When choosing a finish for your candle holders, you want a safe, non-toxic option that’s compatible with your wood treatment. Look for finishes labeled food-safe or non-toxic, like beeswax or mineral oil, which are gentle and won’t emit harmful fumes. Always check finish compatibility with your wood type, and apply in a well-ventilated area. This guarantees your candle holders are safe, durable, and beautifully finished.
Conclusion
Now that you’ve crafted your natural wood candle holder, you’ve created a warm, inviting centerpiece that’s as unique as a fingerprint. With each carefully chosen, shaped, and finished piece, you’ve turned raw wood into a glowing work of art. Just like a lighthouse guiding the way, your handmade creation brings a cozy glow and personal charm to any space. Enjoy the flickering light and the satisfaction of your creative journey!